
How to display super high-res images on Squarespace
By default, Squarespace enforces a strict platform limit: every image uploaded to the platform is forcefully downscaled and capped at a maximum width of 2,500 pixels. For high-end portfolios, fine art, blueprints, or detailed photography, this compression affects the vital fine textures and details.
Macroom Viewer completely bypasses this 2,500px ceiling by handling images as a dynamic pyramid of tiles, loading only the exact pixels your user is looking at.
This step-by-step documentation will guide you through preparing your assets, leveraging the native platform, and embedding the deep-zoom viewer on your page.
Before You Start
Before embedding a high-resolution image, make sure you have the following ready:
Squarespace Business Plan or higher — Required for custom JavaScript plugin injection.
Macroom Viewer Plugin — Installed on your site (either the One-Time or Yearly version).
Your origin image — Ready to be processed into deepzoom-compatible pyramid tiles.
Step 1: Turn original file into pyramid tiles
You can use your favorite image slicer tool to turn your origin image into pyramid tiles, or you can use our built-in tool. It will automatically generate your pyramid tiles in the required Zoomify format.
The Macroom slicing tool runs completely offline right inside your browser, so the speed of generation will rely on your local computer performance. No files are uploaded to our servers.

Once processing is complete, download the generated ZIP file containing all the individual tiles and proceed to Step 2.
Step 2: Upload the tiles into Squarespace Asset Library
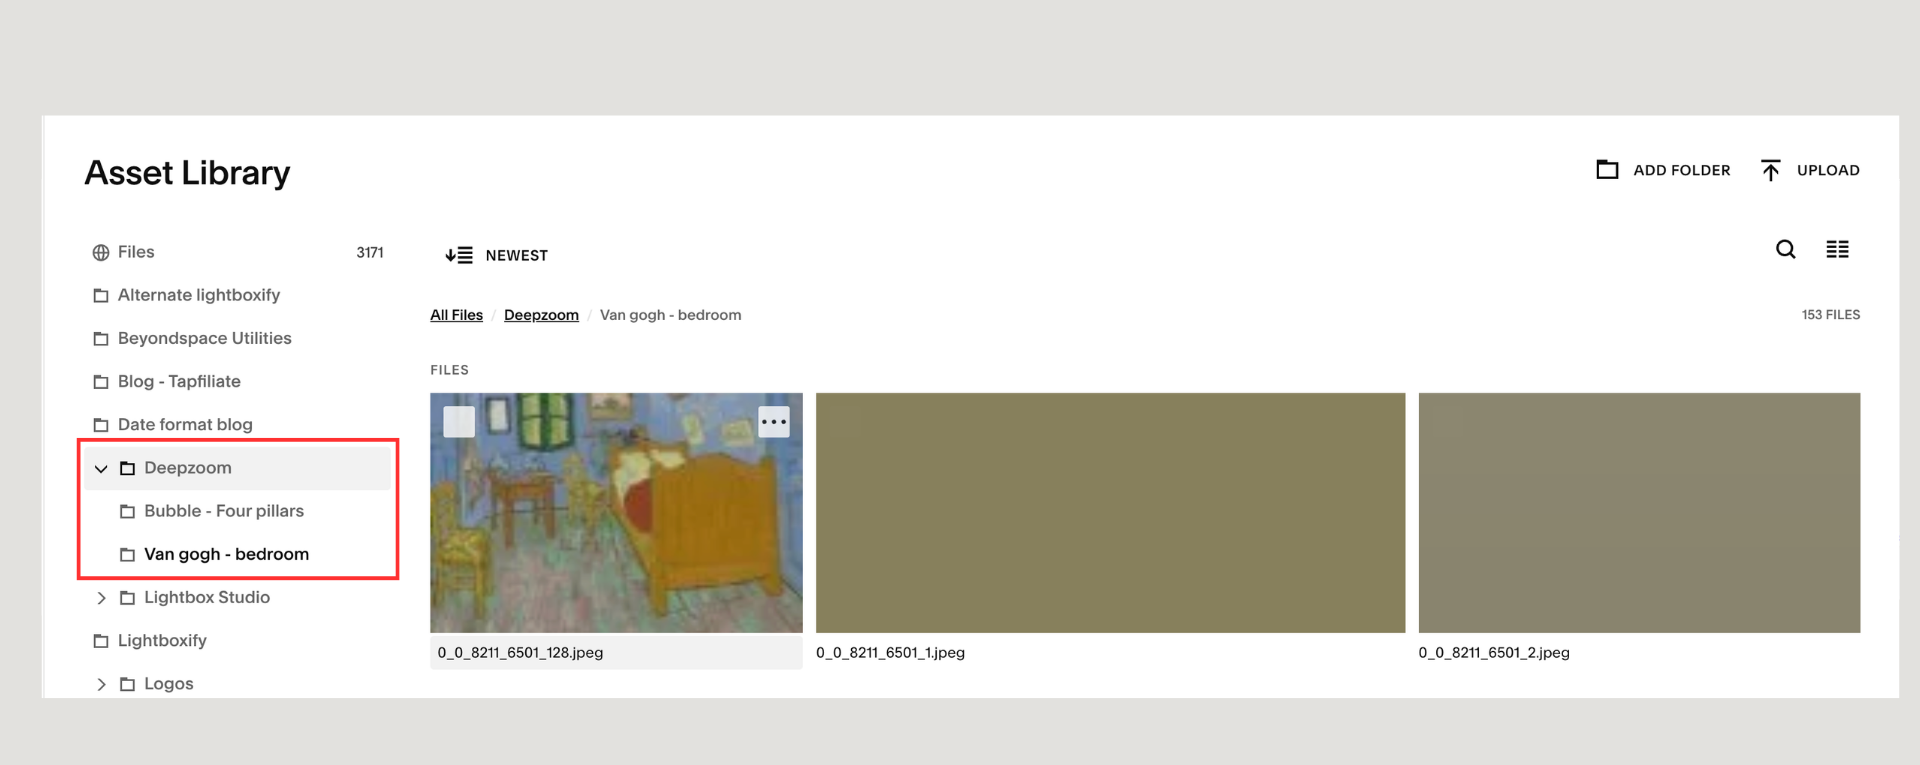
Upload tiles to Squarespace
Log into your Squarespace dashboard and navigate to the Website → Asset to enter Asset Library
Create a separate, dedicated folder specifically named for those tiles to keep your assets organized.
Unzip your tile folder in step 1 locally, and upload all the raw image files directly into this new Asset Library folder (find the sub folder the contains all the tiles images)
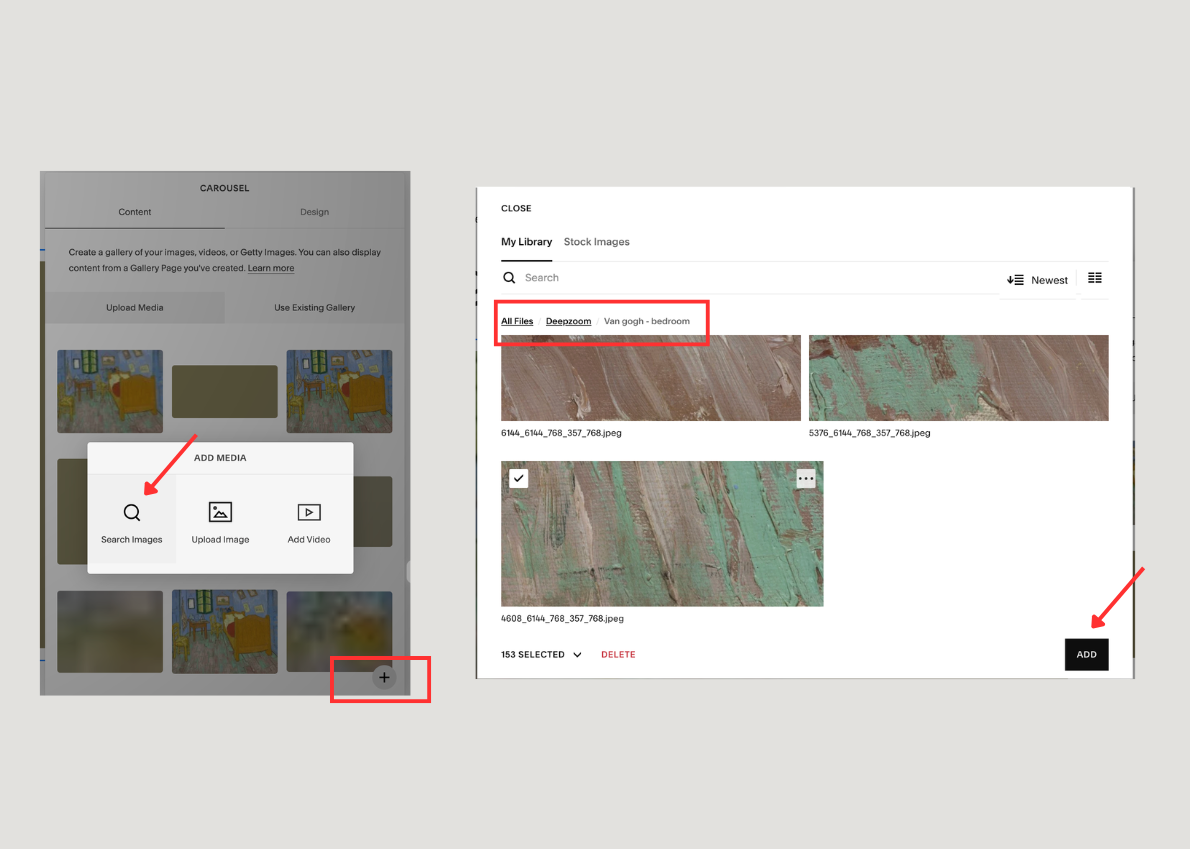
Step 3: Create a source gallery from the assets
Images uploaded directly to the Asset Library are not publicly accessible by plugins unless you pull them into a page element. Let’s create a hidden Gallery block as source container:
Create a new Blog collection in your unlinked pages section and insert a new blog post.
Inside that blog post layout, insert a standard Gallery block.
Import your tile images directly from your dedicated folder in the Asset Library.
Optional: Set the Gallery block layout style to Slideshow (this minimizes background HTML markup for better rendering speed).
Copy and save the URL slug of this specific blog post, then publish it.
Create source of tiles
Some side notes:
You can technically place this source gallery block on any standard page. However, keeping them inside unlinked blog posts keeps your site structure clean, compartmentalized, and organized.
Depending on the total number of images being imported into the Gallery block, you may notice your browser window temporarily hang up or freeze. This is completely normal behavior while Squarespace indexes a large portion of images into the block architecture simultaneously.
Step 4: Embed the high-res images
To display your deep-zoom interactive asset, you will place a standard Image Block on your public page and attach a link to the source gallery created above (with some special parameters).
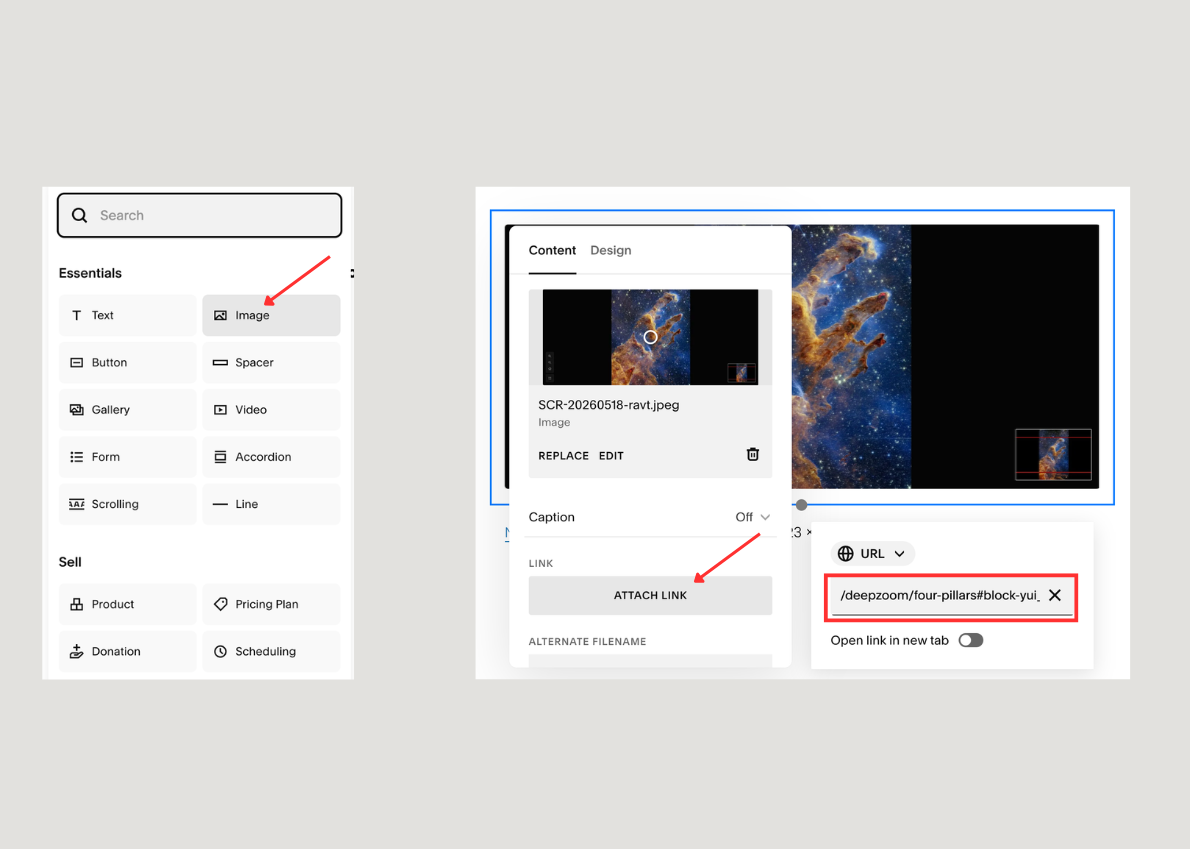
Link to the source gallery
Assuming your hidden source blog post URL is located at /source/image, you will format your click-through URL link using the following query string structure:
/source/image?deepzoomify=true&tileSize=512#gallery_block_id
Parameter Breakdown:deepzoomify=true - Tells the plugin to intercept this specific image block and convert it into a zoom canvas.
tileSize=512 - Declares the layout width of your generated tiles (set this to 512 or 1024 depending on how you sliced it in Step 1).
#gallery_block_id - This points the plugin directly to your exact source block ID. Note: This is optional. If you leave out the hash, the plugin will simply default to the first available gallery block it finds on the page.
Save your page, refresh, and you can now enjoy your super high-res image displays running natively on your site!
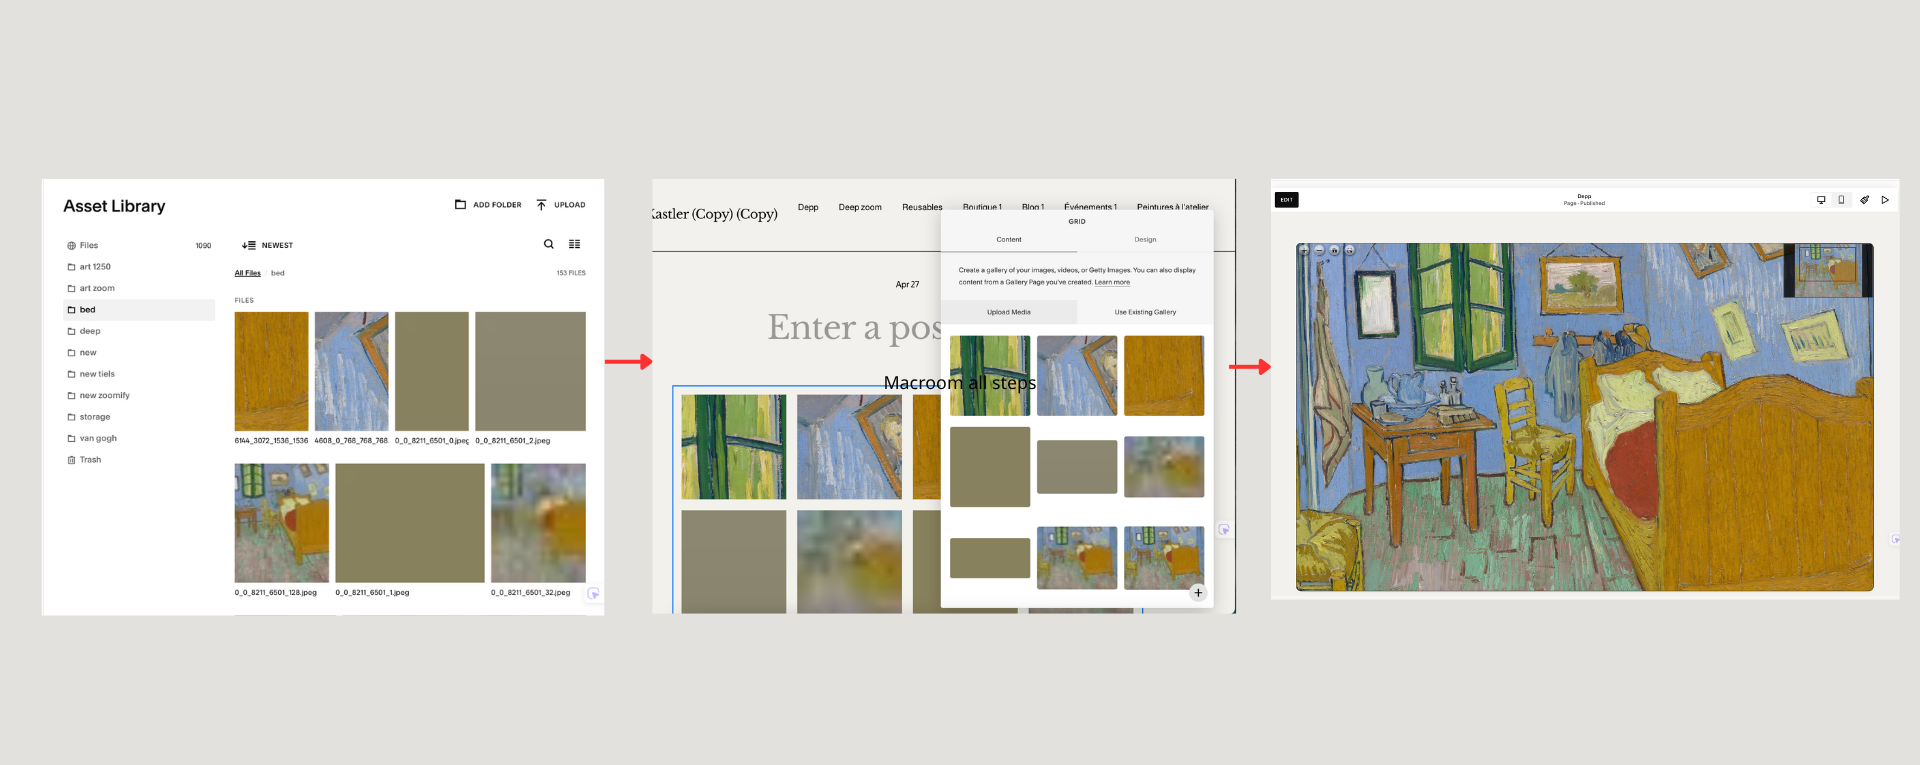
All steps simplified for high-res images on Squarespace
Advanced Discussion
What is the maximum resolution Macroom Viewer can handle?
The engine is built to process massive, gigapixel-scale master files smoothly. We have successfully stress-tested it using extreme assets with zero performance degradation, including:
NASA’s Webb Four Pillars of Creation: 8,423 × 14,589 pixels (~159MB) into 202 1024px-tiles
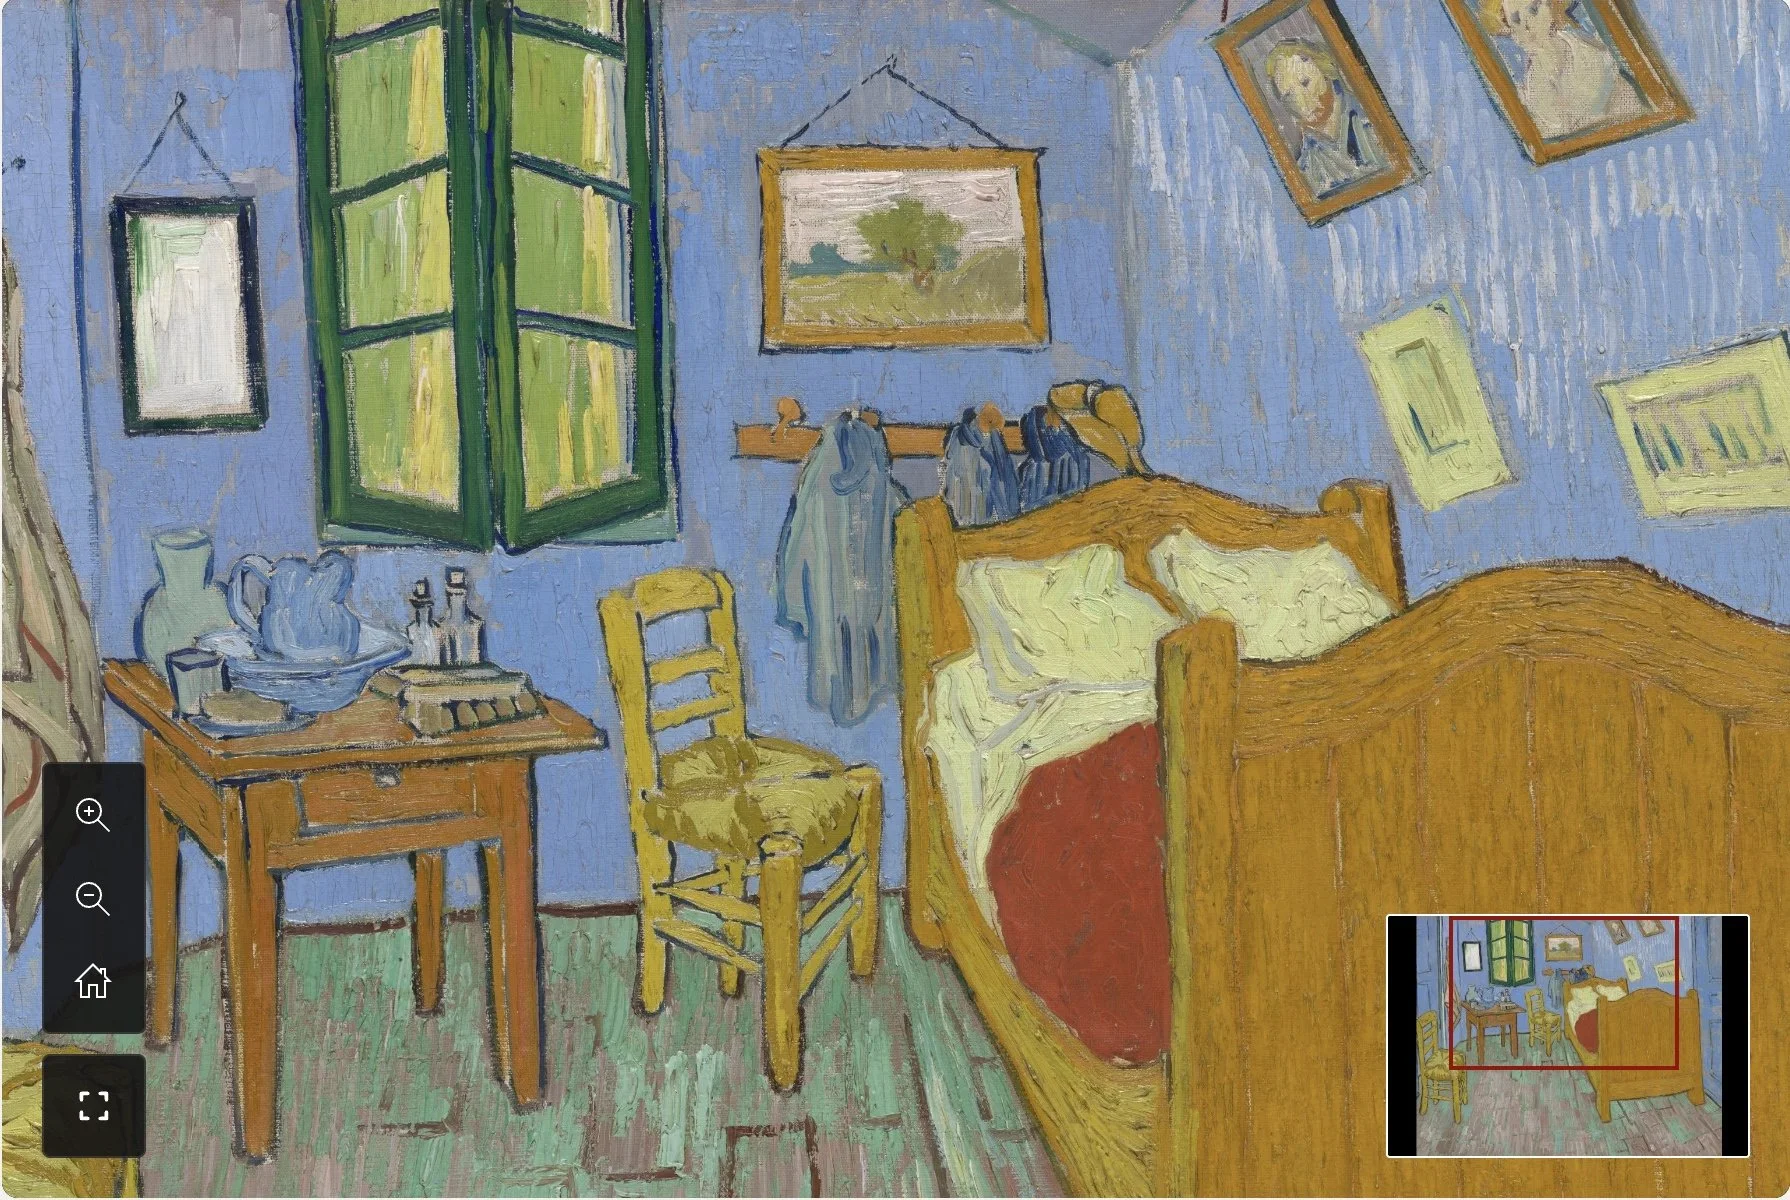
Van Gogh’s The Bedroom: 8,211 × 6,501 pixels (~300MB) into 154 768px-tiles
However, these massive edge-case examples should be treated as the maximum threshold of technical support. In everyday reality, to keep mobile devices fast and snap-responsive over standard mobile data networks, you should design your tile generation to target roughly 80 to 120 total tiles per image layout.