N8N Series - Properly Configure Google OAuth2 Credentials in N8N – Best Practices
Google offers a wide range of services used globally, making Google integration one of the most common tasks when working with N8N—especially in self-hosted environments. But are you sure you’ve set it up correctly? Do you run into issues signing in after a few days, or struggle to complete the configuration on your own? If any of this sounds familiar, this guide is for you.
Google Console Setup
First of all, you need to access the Google Console in order to effectively manage and configure your Google service settings.
Create your project
Create your new project for setting up N8N credentials
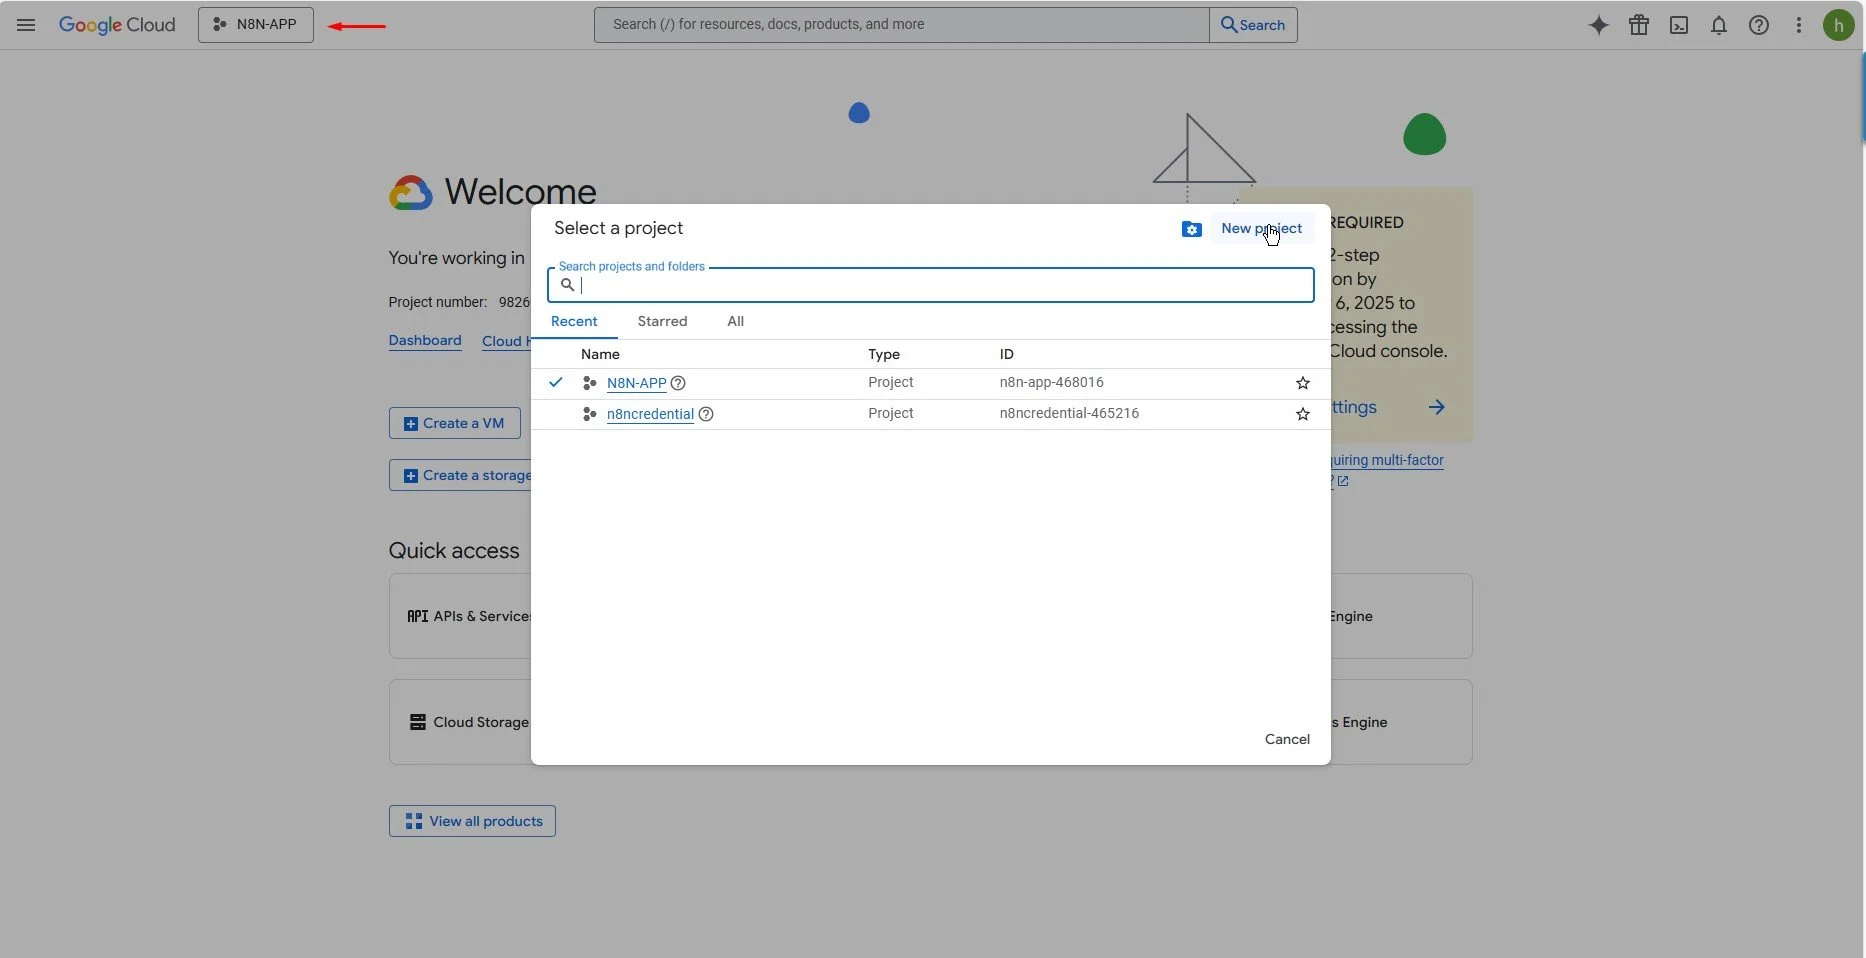
Create a new project to set up your credentials
Google needs some time to set up your new project, so wait for a little bit. Once it's ready, you can choose it from the notification at the top-right corner.
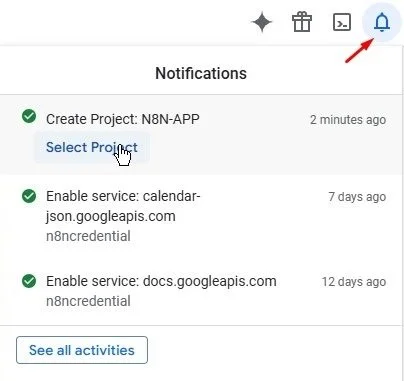
Create a new project successfully
Setup the Auth Consent screen
Access the API & Service > OAuth consent screen
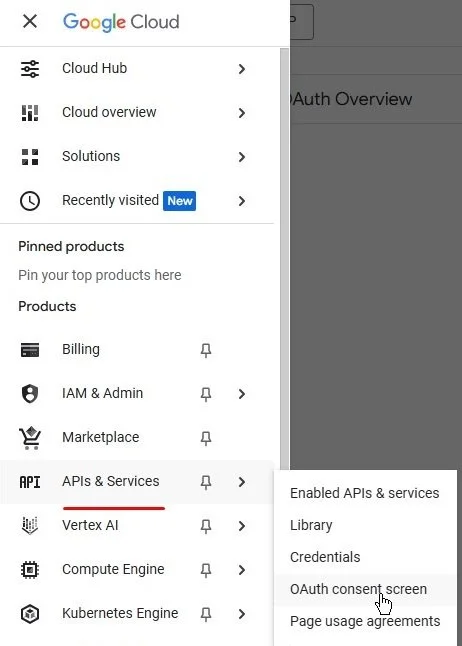
OAuth consent screen path
Create new branding
Click Get Started in the Overview screen, enter the some information for creating new branding
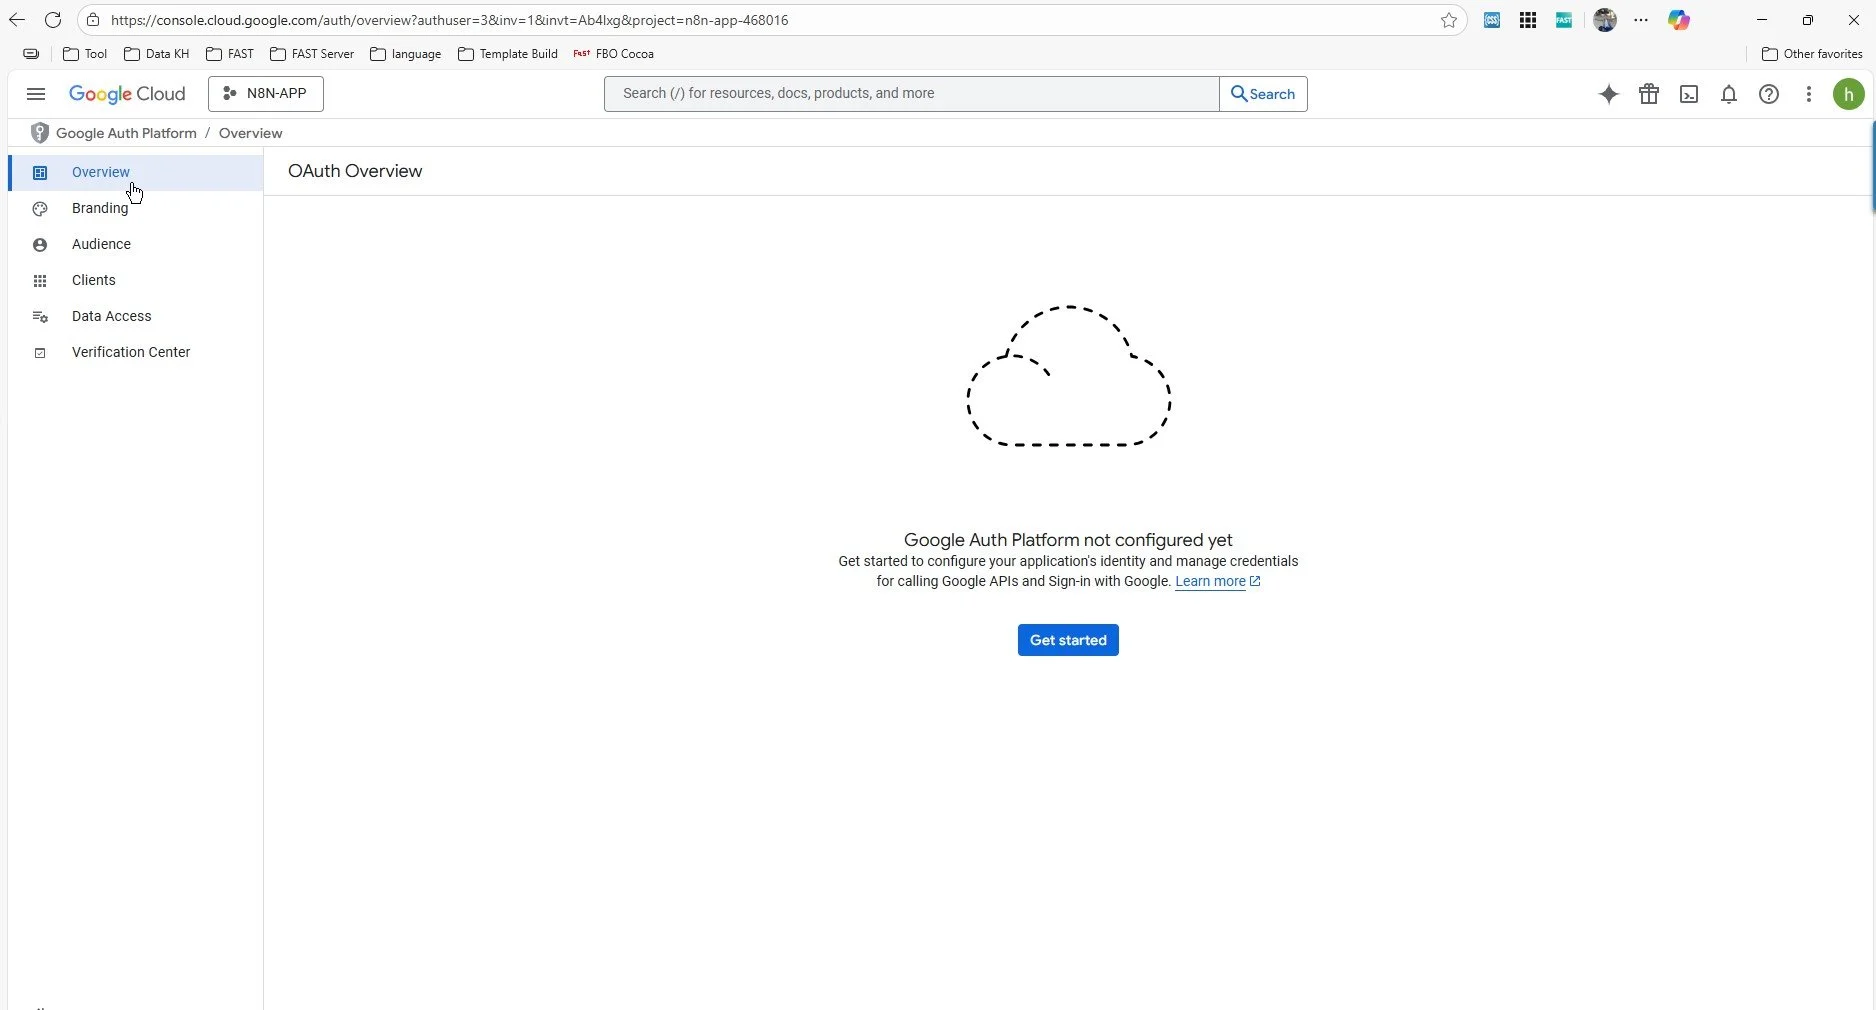
General view of Google Auth
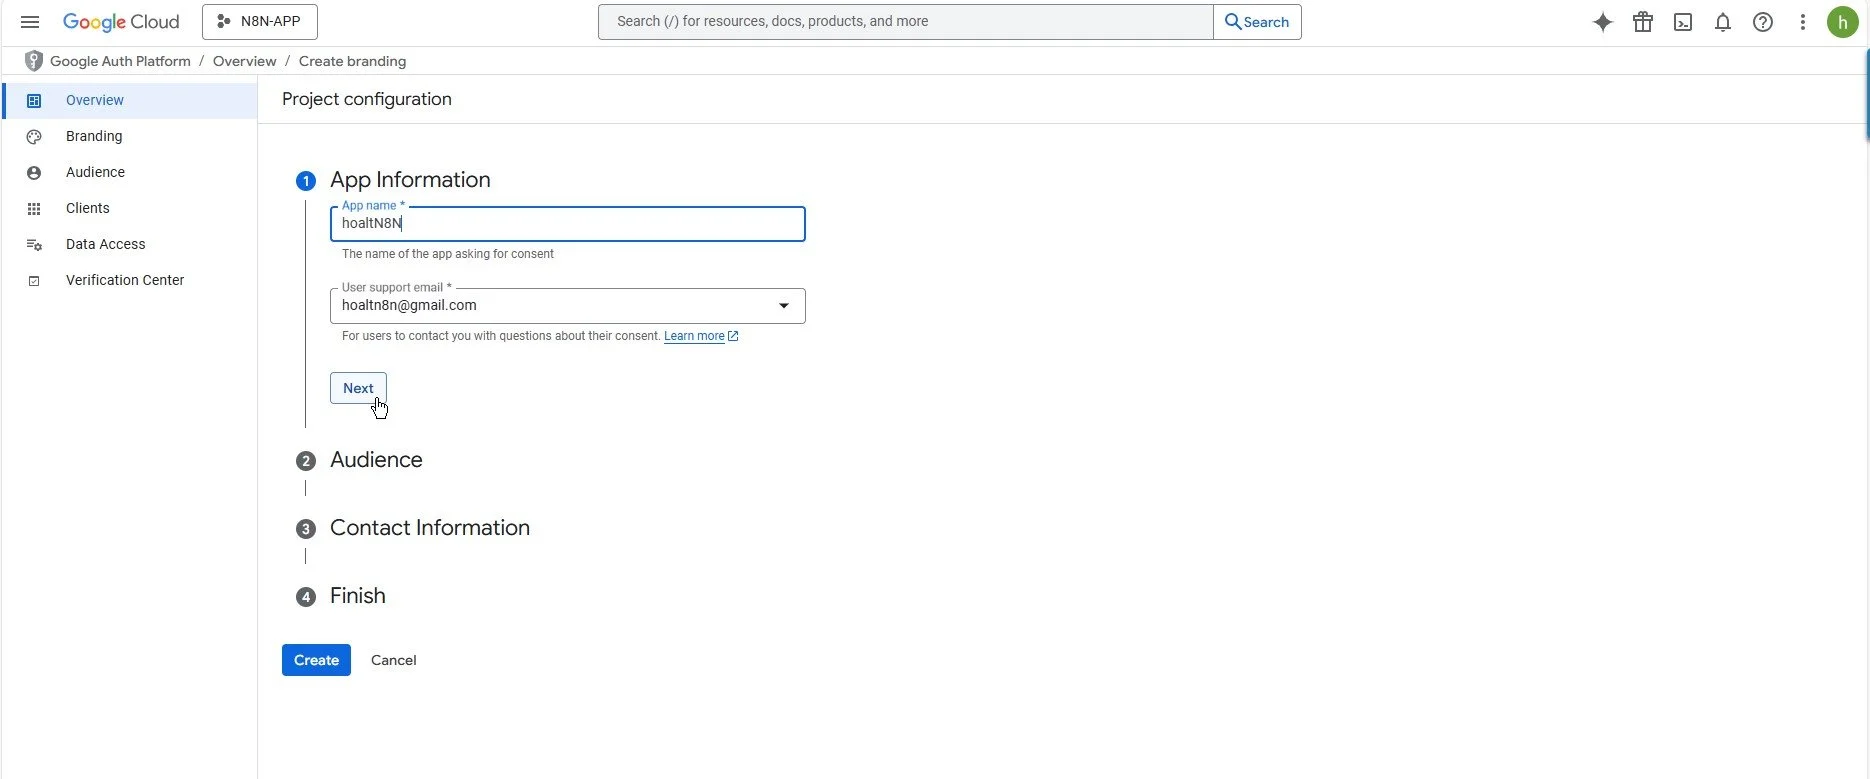
App information
In Audience information, choose External
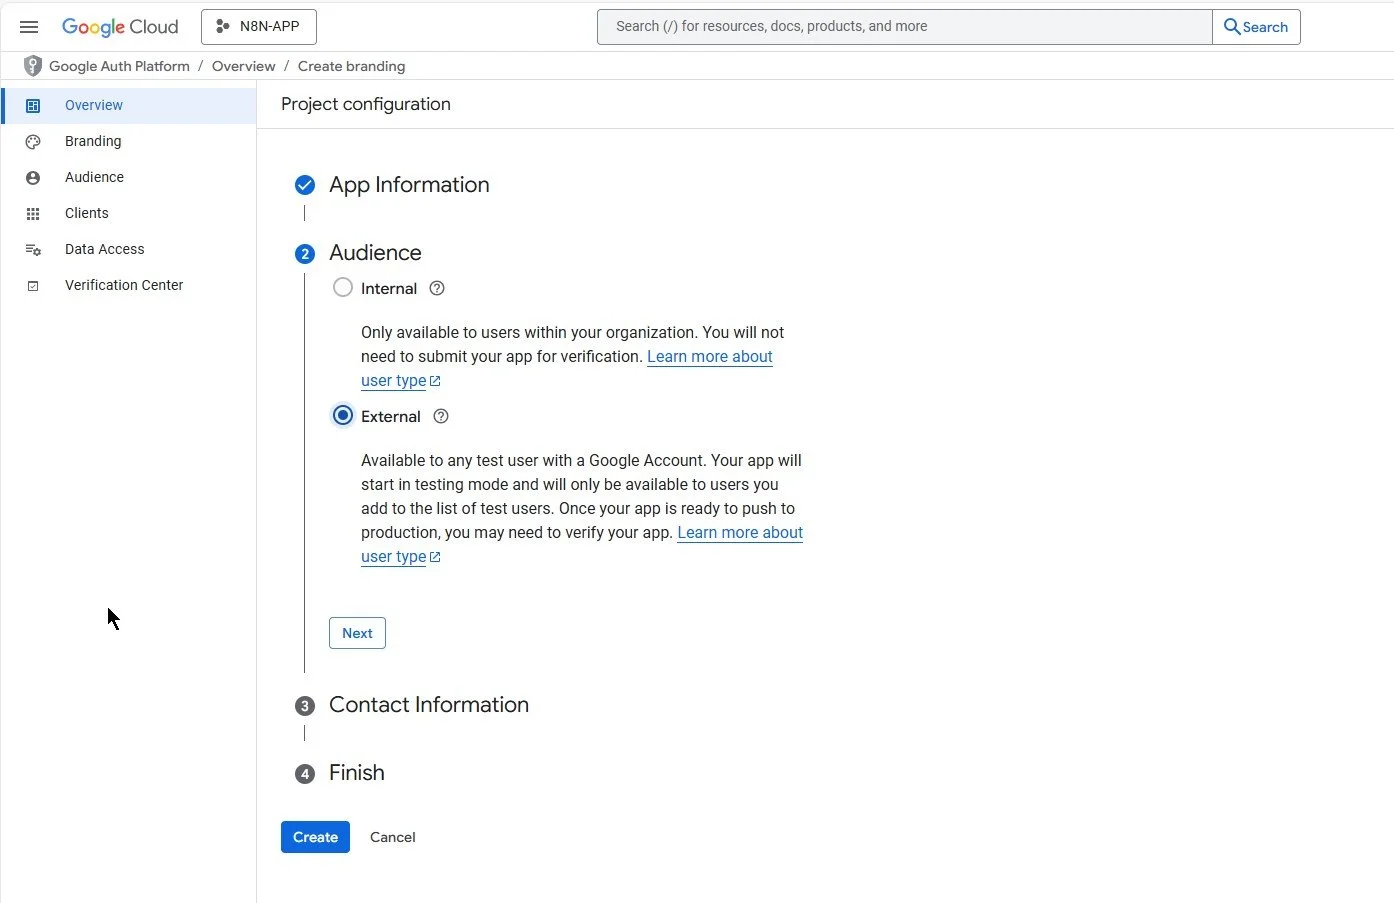
Audience - choose External
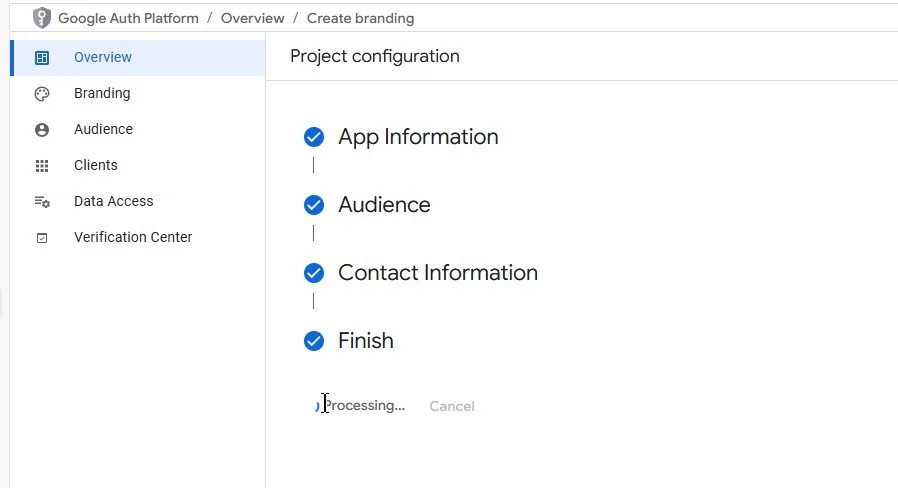
Finish creating branding
Branding Configuation
Provide your reference information for branding. You can only save the branding information once the details of the Authorized domains have been accurately verified and confirmed.
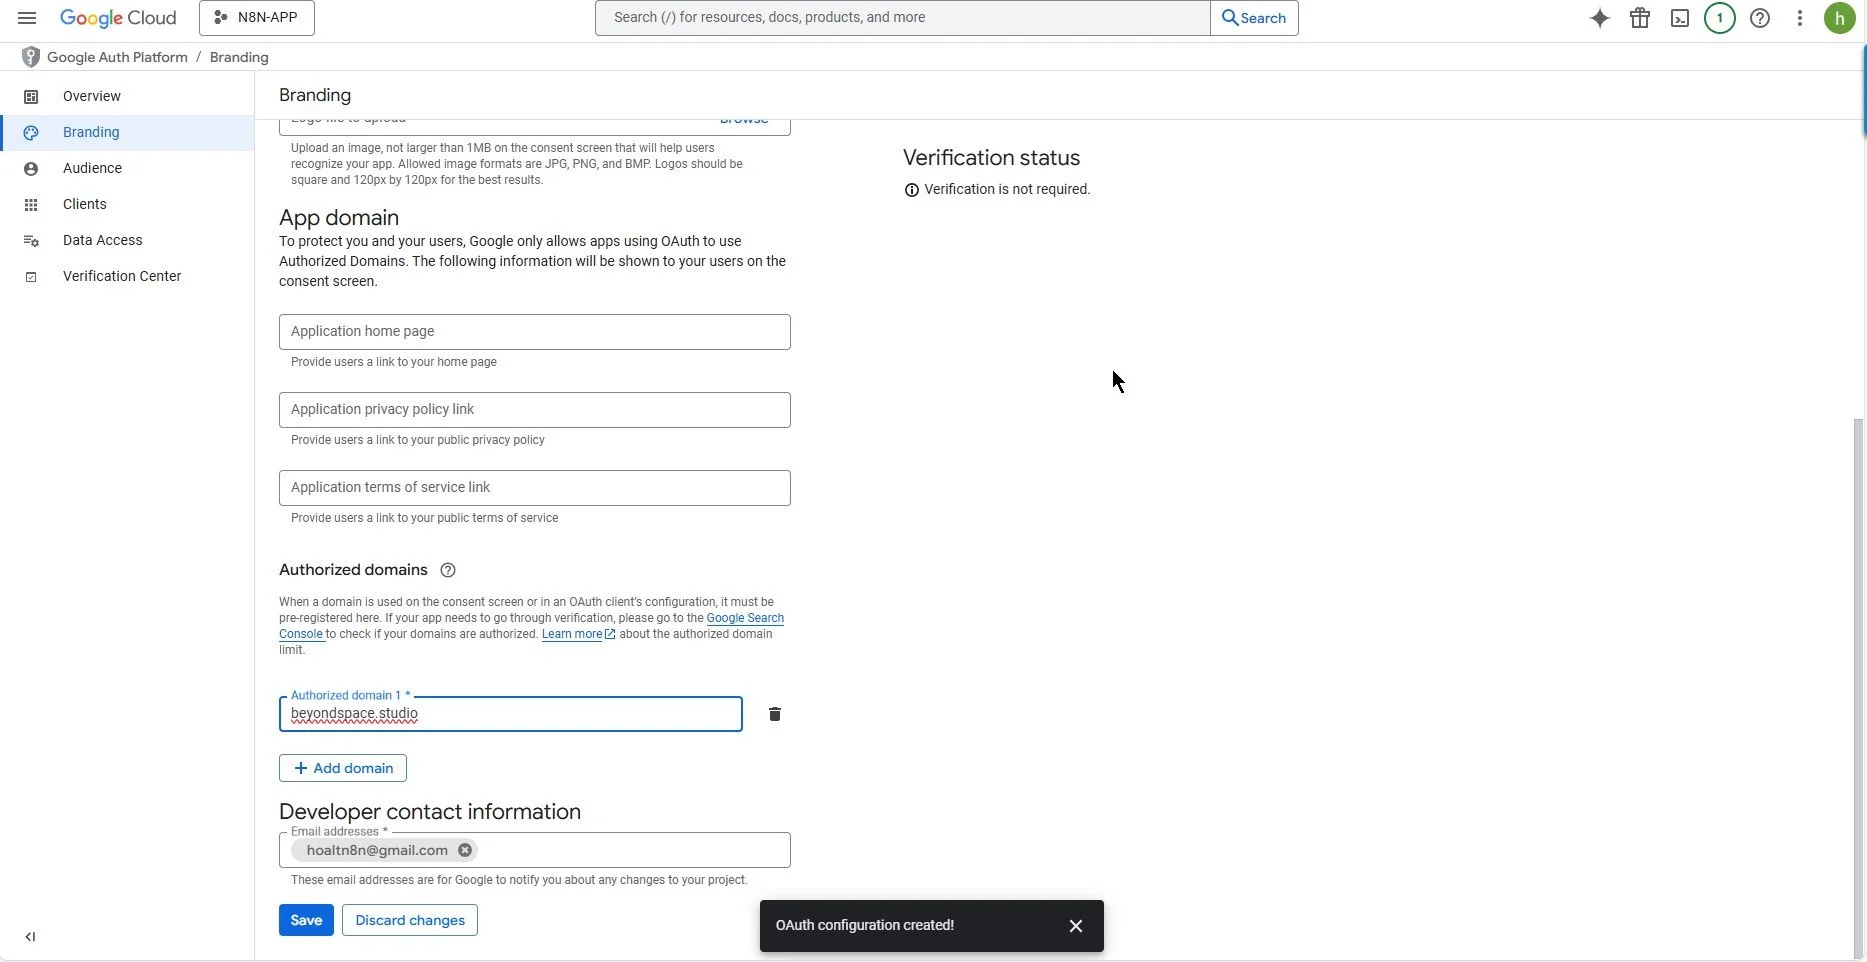
Branding information
Clients Configuation
Access the Clients, then click on Create Client

Create new client
Client declaration settings:
Application type: Web application
Name: Choose your own
Authorized redirect URLs: Use OAuth redirect URL from N8N credentials connection setup
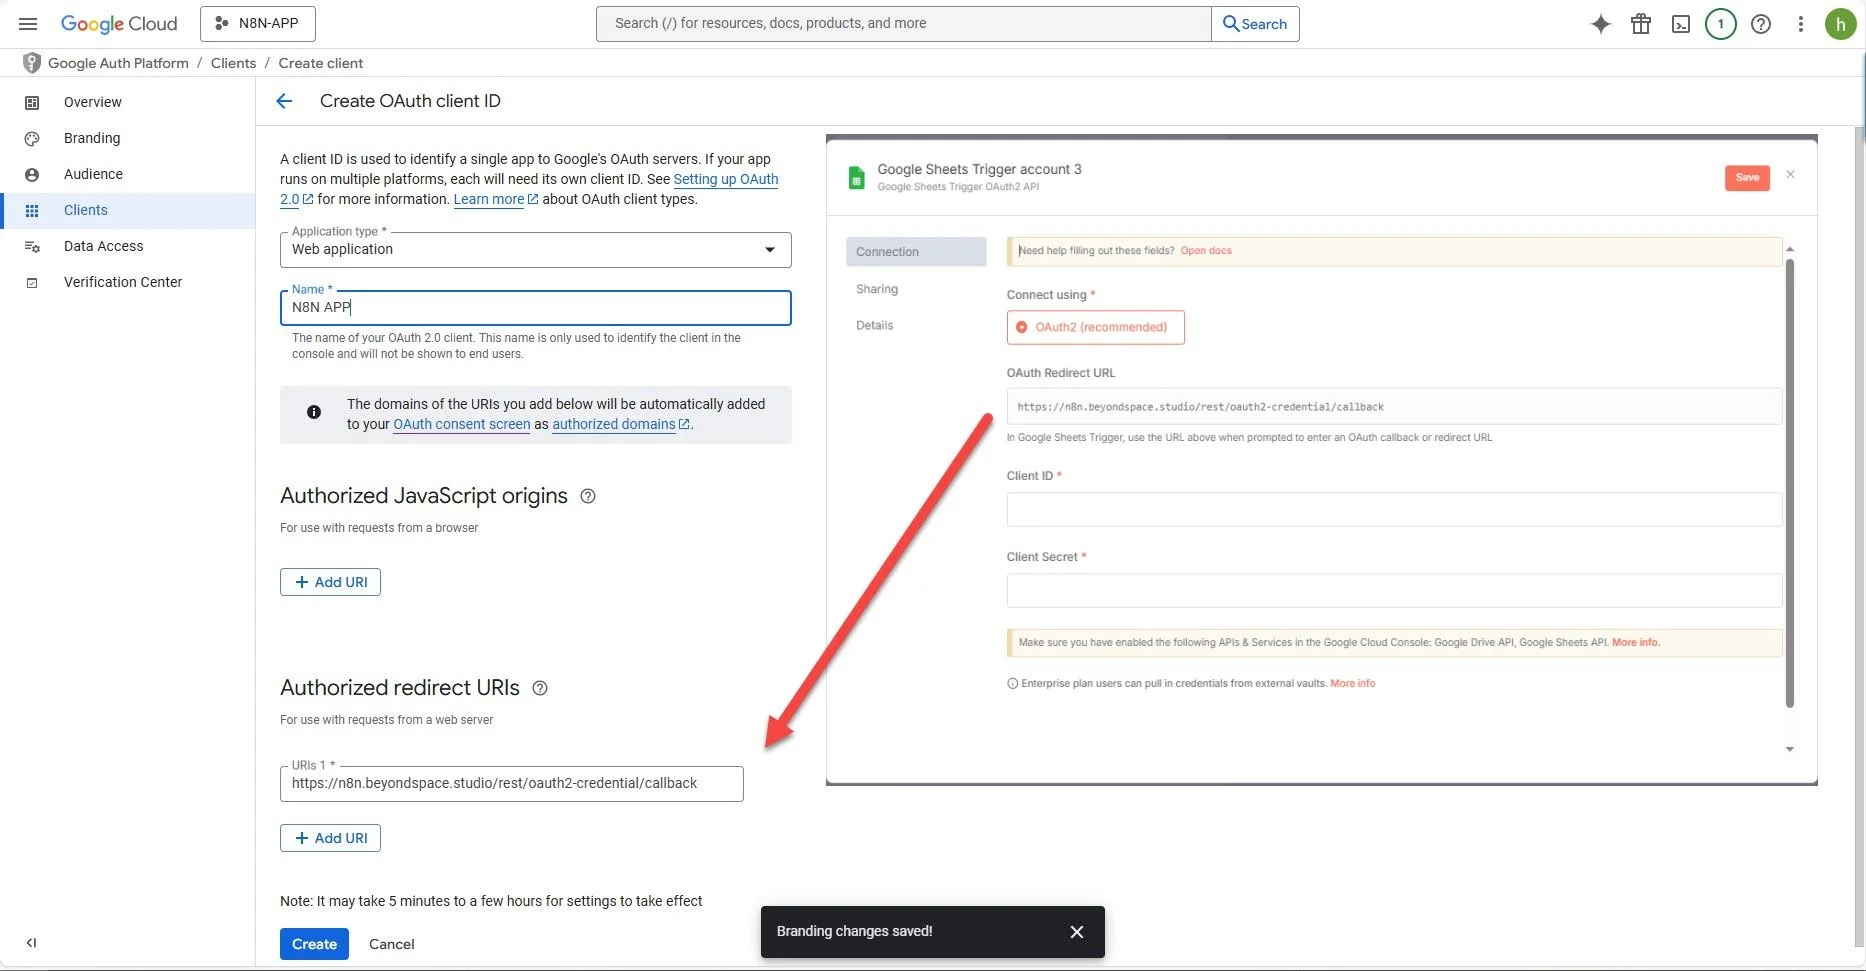
Define correct Authorized redirect URLs
After finishing the above, Google Console will give you a Client ID and Client Secret. Keep them for the next step.
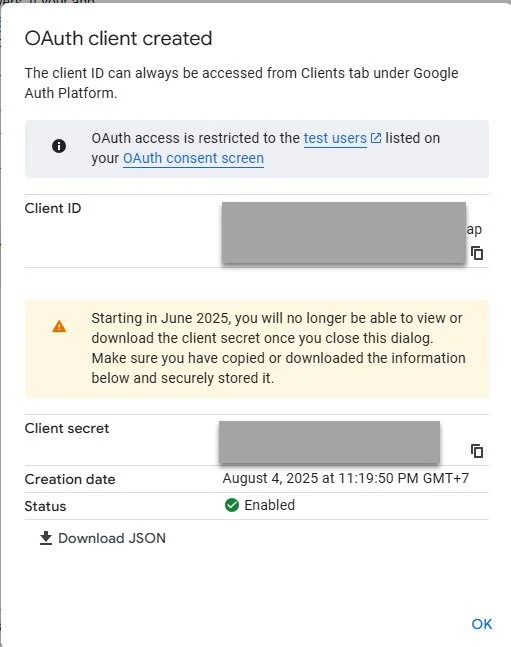
Get and save the Client ID and Client secret
Publish your app
This is the main point of this tutorial. Besides the usual guidelines about adding the right scope for access in Google Console, here you only need to go to Audience and click on Publish app. That's it.

Publish your app in Audience
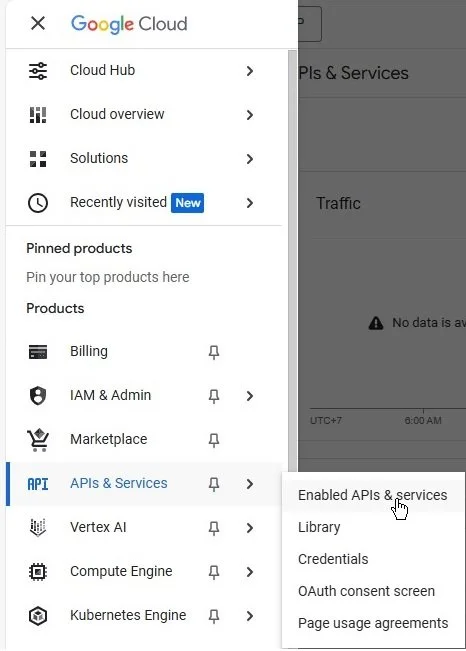
Enable your API
Based on your specific needs and preferences, you can easily search for the services you require and enable them promptly without any delay with the path: Access API & Services > Enable APIs & service
Enable your required API service
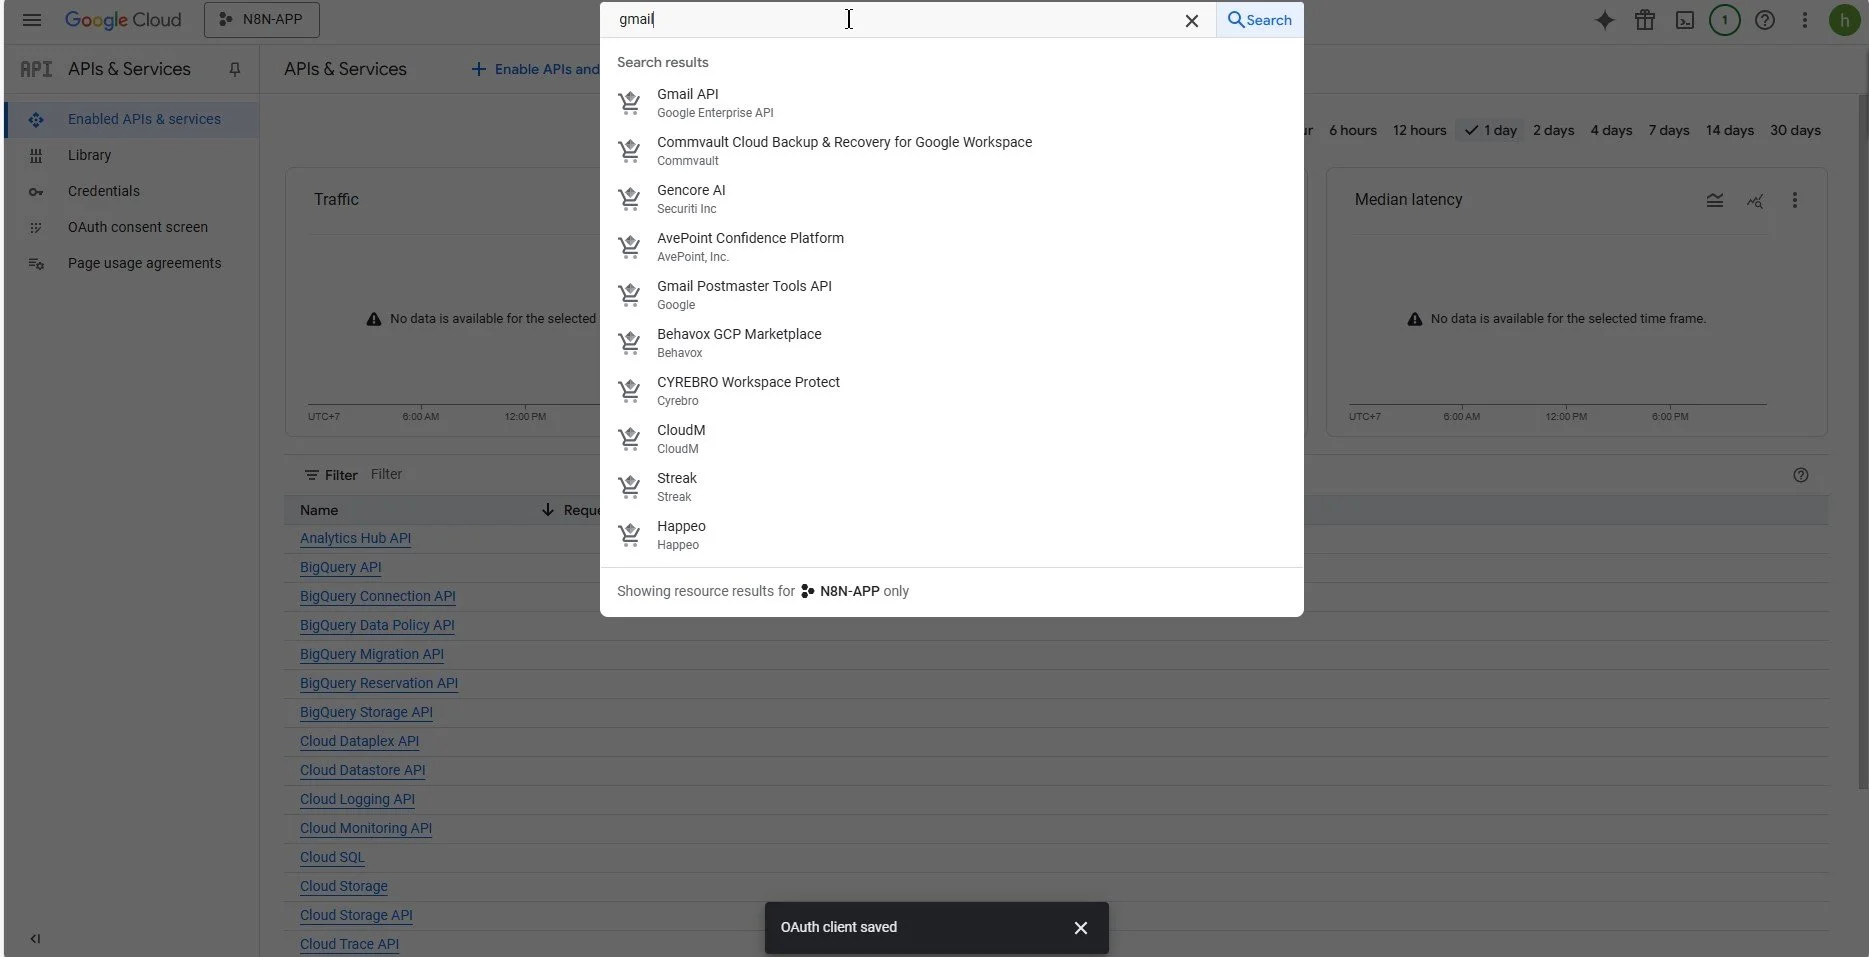
Ex: search Gmail api for enalble
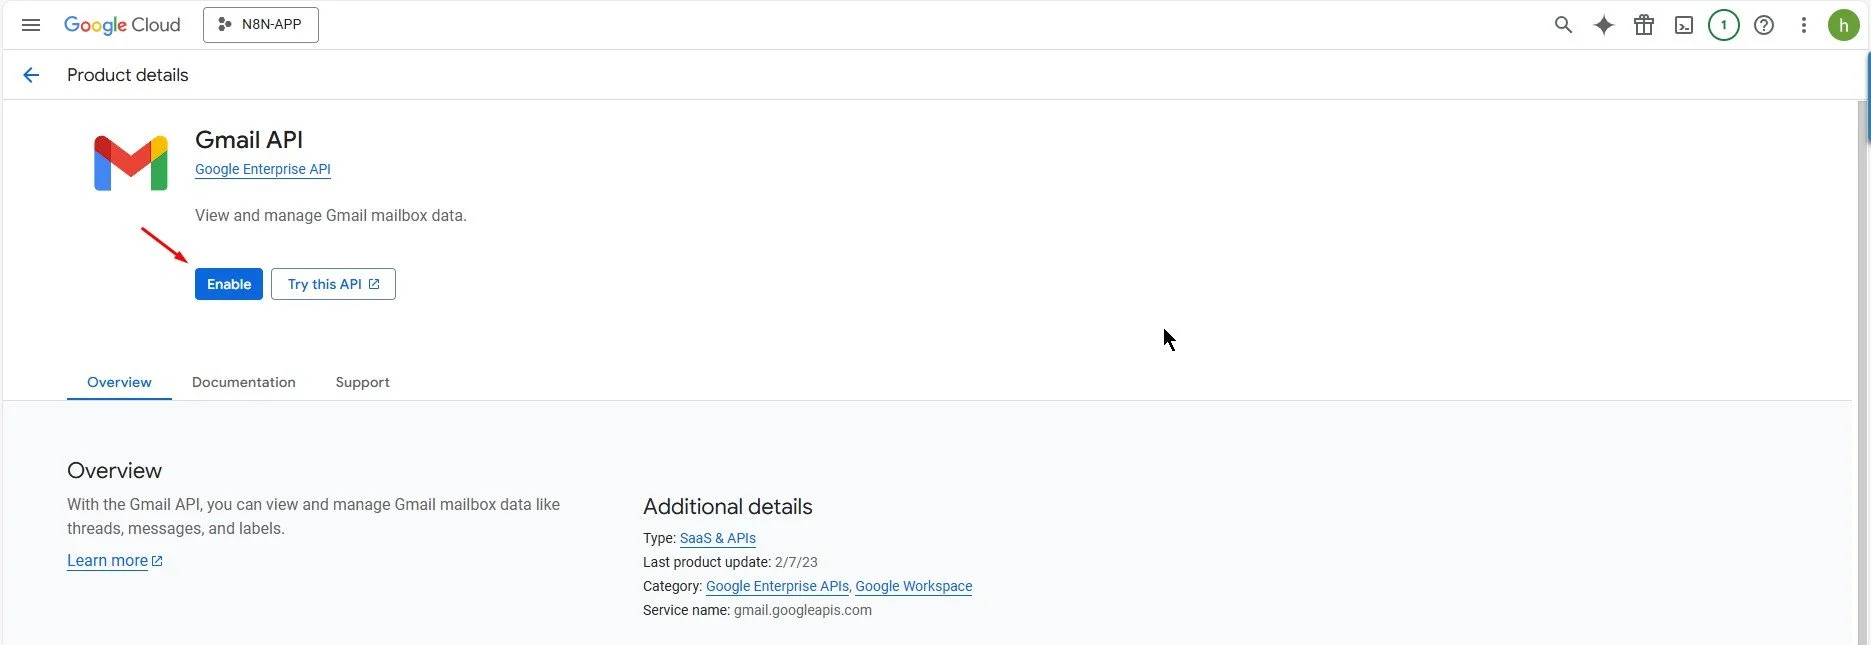
Enable your api / services
If you’ve reached this point, all the Google Console setup is done. Now, go to N8N and finish the simple last steps to complete the your google credentails
Configure your Google credentials in N8N
Provide connection information
Use the Client ID (1) and Client Secret (2) from Google Console – Clients Configuration we work through above. Enter them in the N8N credential setup, then click "Sign in with Google." A login window will appear to choose your account.
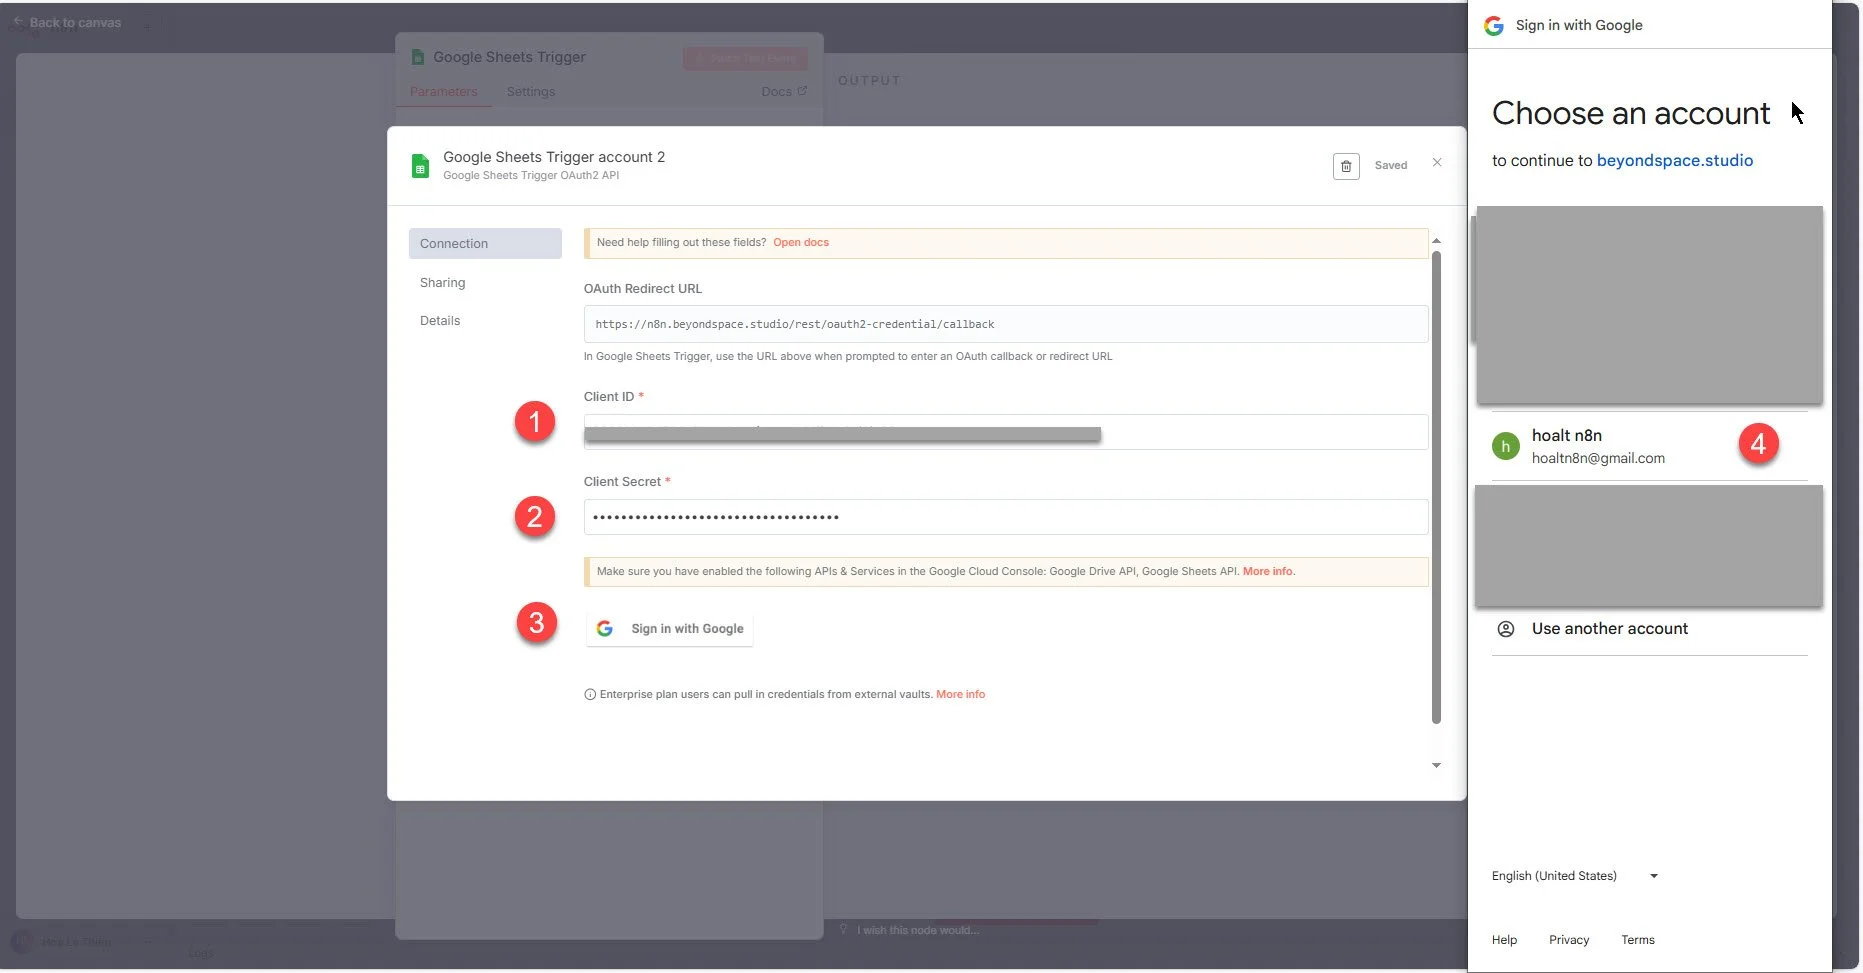
Credential configuation
Click on Advanced and then on Go to your domain (unsafe)
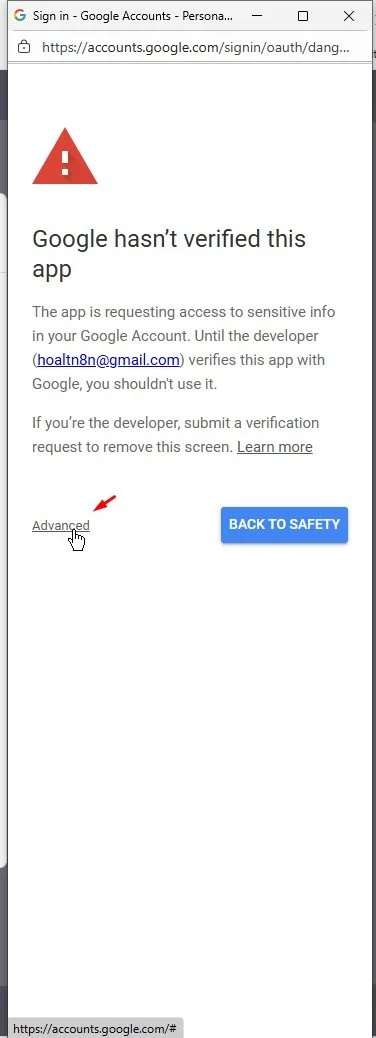

Grant Access to your N8N domain
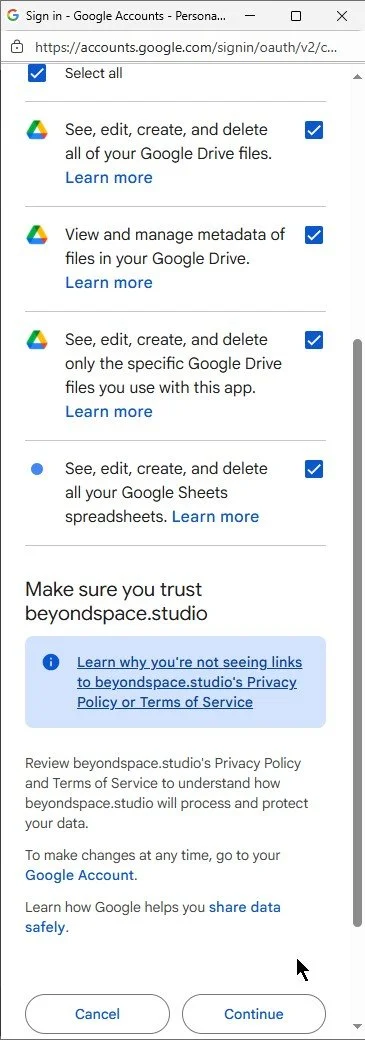
Access right for your N8N domain

Successful Configuation
At this stage, you've successfully completed the initial setup for your Google credentials in N8N, and you're ready to move forward with building your workflow just the way you want.
Thanks to this setup, you won't need to log in to your Google account repeatedly—your credentials will remain active as long as your N8N instance continues running smoothly without interruptions.