How to Create Reusable Shopify Buy Button on Squarespace
Want to sell products on your Squarespace site but prefer Shopify's robust e-commerce features? The Shopify Buy Button is the perfect solution. It allows you to embed a product directly onto any Squarespace page, article, or blog post.
While the Shopify Buy Button code is easy to generate, manually adding it to multiple pages and updating it everywhere can be a huge hassle. This guide will show you how to streamline the process by creating a reusable Shopify Buy Button using the Synced Blocks plugin.
Prerequisites
A Shopify Account: You need an active Shopify account (any plan, including the Starter plan) with at least one product added.
A Squarespace Core (legacy Business) Plan: You must have a Squarespace Core plan or higher, as this is required to use the custom Code Block.
The Synced Blocks Plugin: Install and set up the Synced Blocks plugin on your Squarespace site.
Step-by-step guide
These steps below are specifically for creating reusable Shopify Buy Buttons. For a complete, comprehensive guide on creating and managing any type of reusable content with Synced Blocks in Squarespace, please refer to our general tutorial
Step 1: Create Your Shopify Buy Button
First, you'll generate the embed code for your product or collection within your Shopify admin.
From your Shopify dashboard, navigate to Sales Channels > Buy Button.
Click Create a Buy Button.
Choose either Product Buy Button to feature a single product, or Collection Buy Button to showcase an entire group of products.
Select the product or collection you want to feature.
In the editor, customize the button's appearance, layout, and functionality to match your Squarespace site's design. This is a crucial step since any visual changes here will be reflected wherever you place the button.
Once you are happy with the design, click Copy code.

Create Shopify Buy button
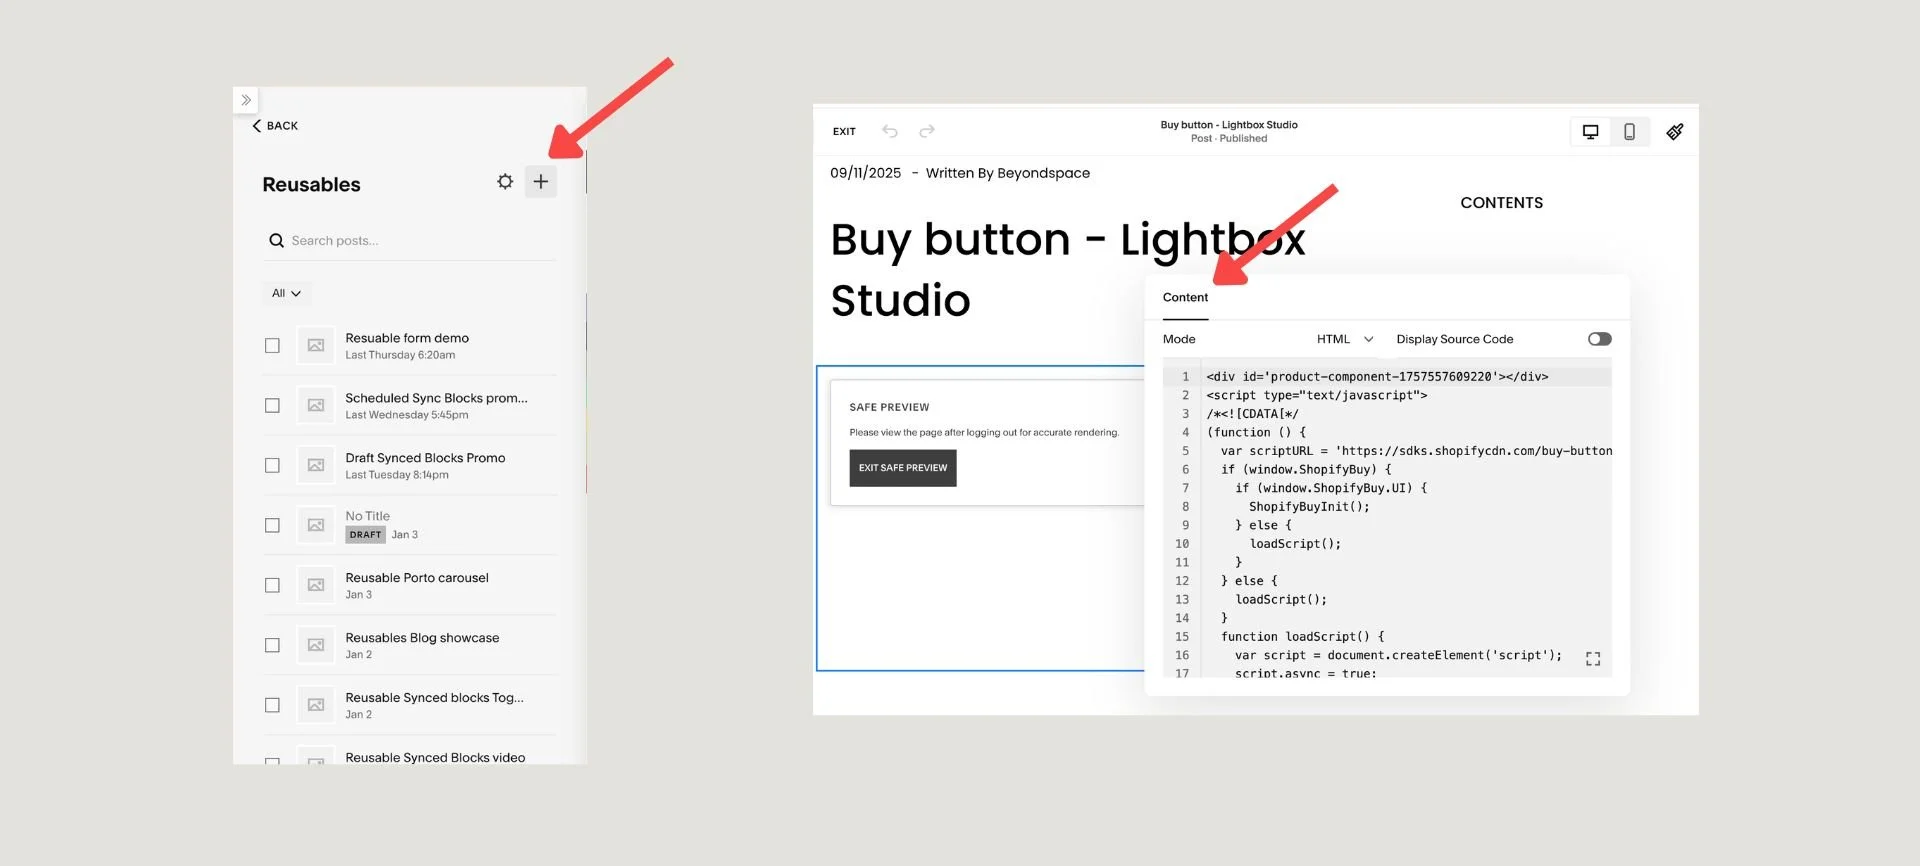
Step 2: Prepare Your Reusable Content in Squarespace
This is where the magic of Synced Blocks comes in. You will create a single "master" Buy Button that can be used across your entire site.
Create Your Reusables Blog: If you haven't already, create a blog collection in Squarespace and name it "Reusables." It is essential that the URL slug for this collection is
/reusablesfor the plugin to work correctly.Add a New Post: In your
Reusablesblog, create a new blog post. The post title should be descriptive, such as "Buy Button - [Product Name]," as this will become the tag used to identify the reusable content later.Insert the Buy Button Code: In the body of your new post, add a Code Block. Paste the Shopify Buy Button code you copied in Step 1 into this block.
Publish the Post: Publish the post to save your work.
Create reusable buy button
Step 3: Sync and Tag Your Content
This step saves your Buy Button as a reusable block that the plugin can reference.
Open Post Settings: From your
Reusablesblog, open the settings for the post you just created.Sync the Content: Locate and click the Sync Content button within the post settings. This action will save the content of the Code Block as an excerpt. The plugin automatically generates a unique tag from the post's URL slug, which is how the Buy Button will be identified.
Initiate the sync content process
Step 4: Add the Reusable Buy Button to Any Page
Now, you can insert your Buy Button anywhere on your Squarespace site.
Add a Summary Block: On the page or post where you want the button to appear, add a Summary Block.
Link to Reusables: In the Summary Block editor, under the "Content" tab, select your
Reusablesblog collection.Filter by Tag: In the "Filter" section, enable Filter Items and select the unique tag that was generated for your Buy Button post.
Adjust the Design: Under the "Design" tab, set the layout to "List" and the "Number of Items" to
1. This ensures only your Buy Button is displayed.Save Changes: Click "Save" and view your live page. Your Shopify Buy Button should now be beautifully displayed and fully functional.
Pro Tip for Organization: As you add more reusable content, use a combination of categories and tags within your Reusables blog to keep everything organized. For example, add the Category "Buy Button" to group all of your buttons, then use Tags to identify each specific product or collection.
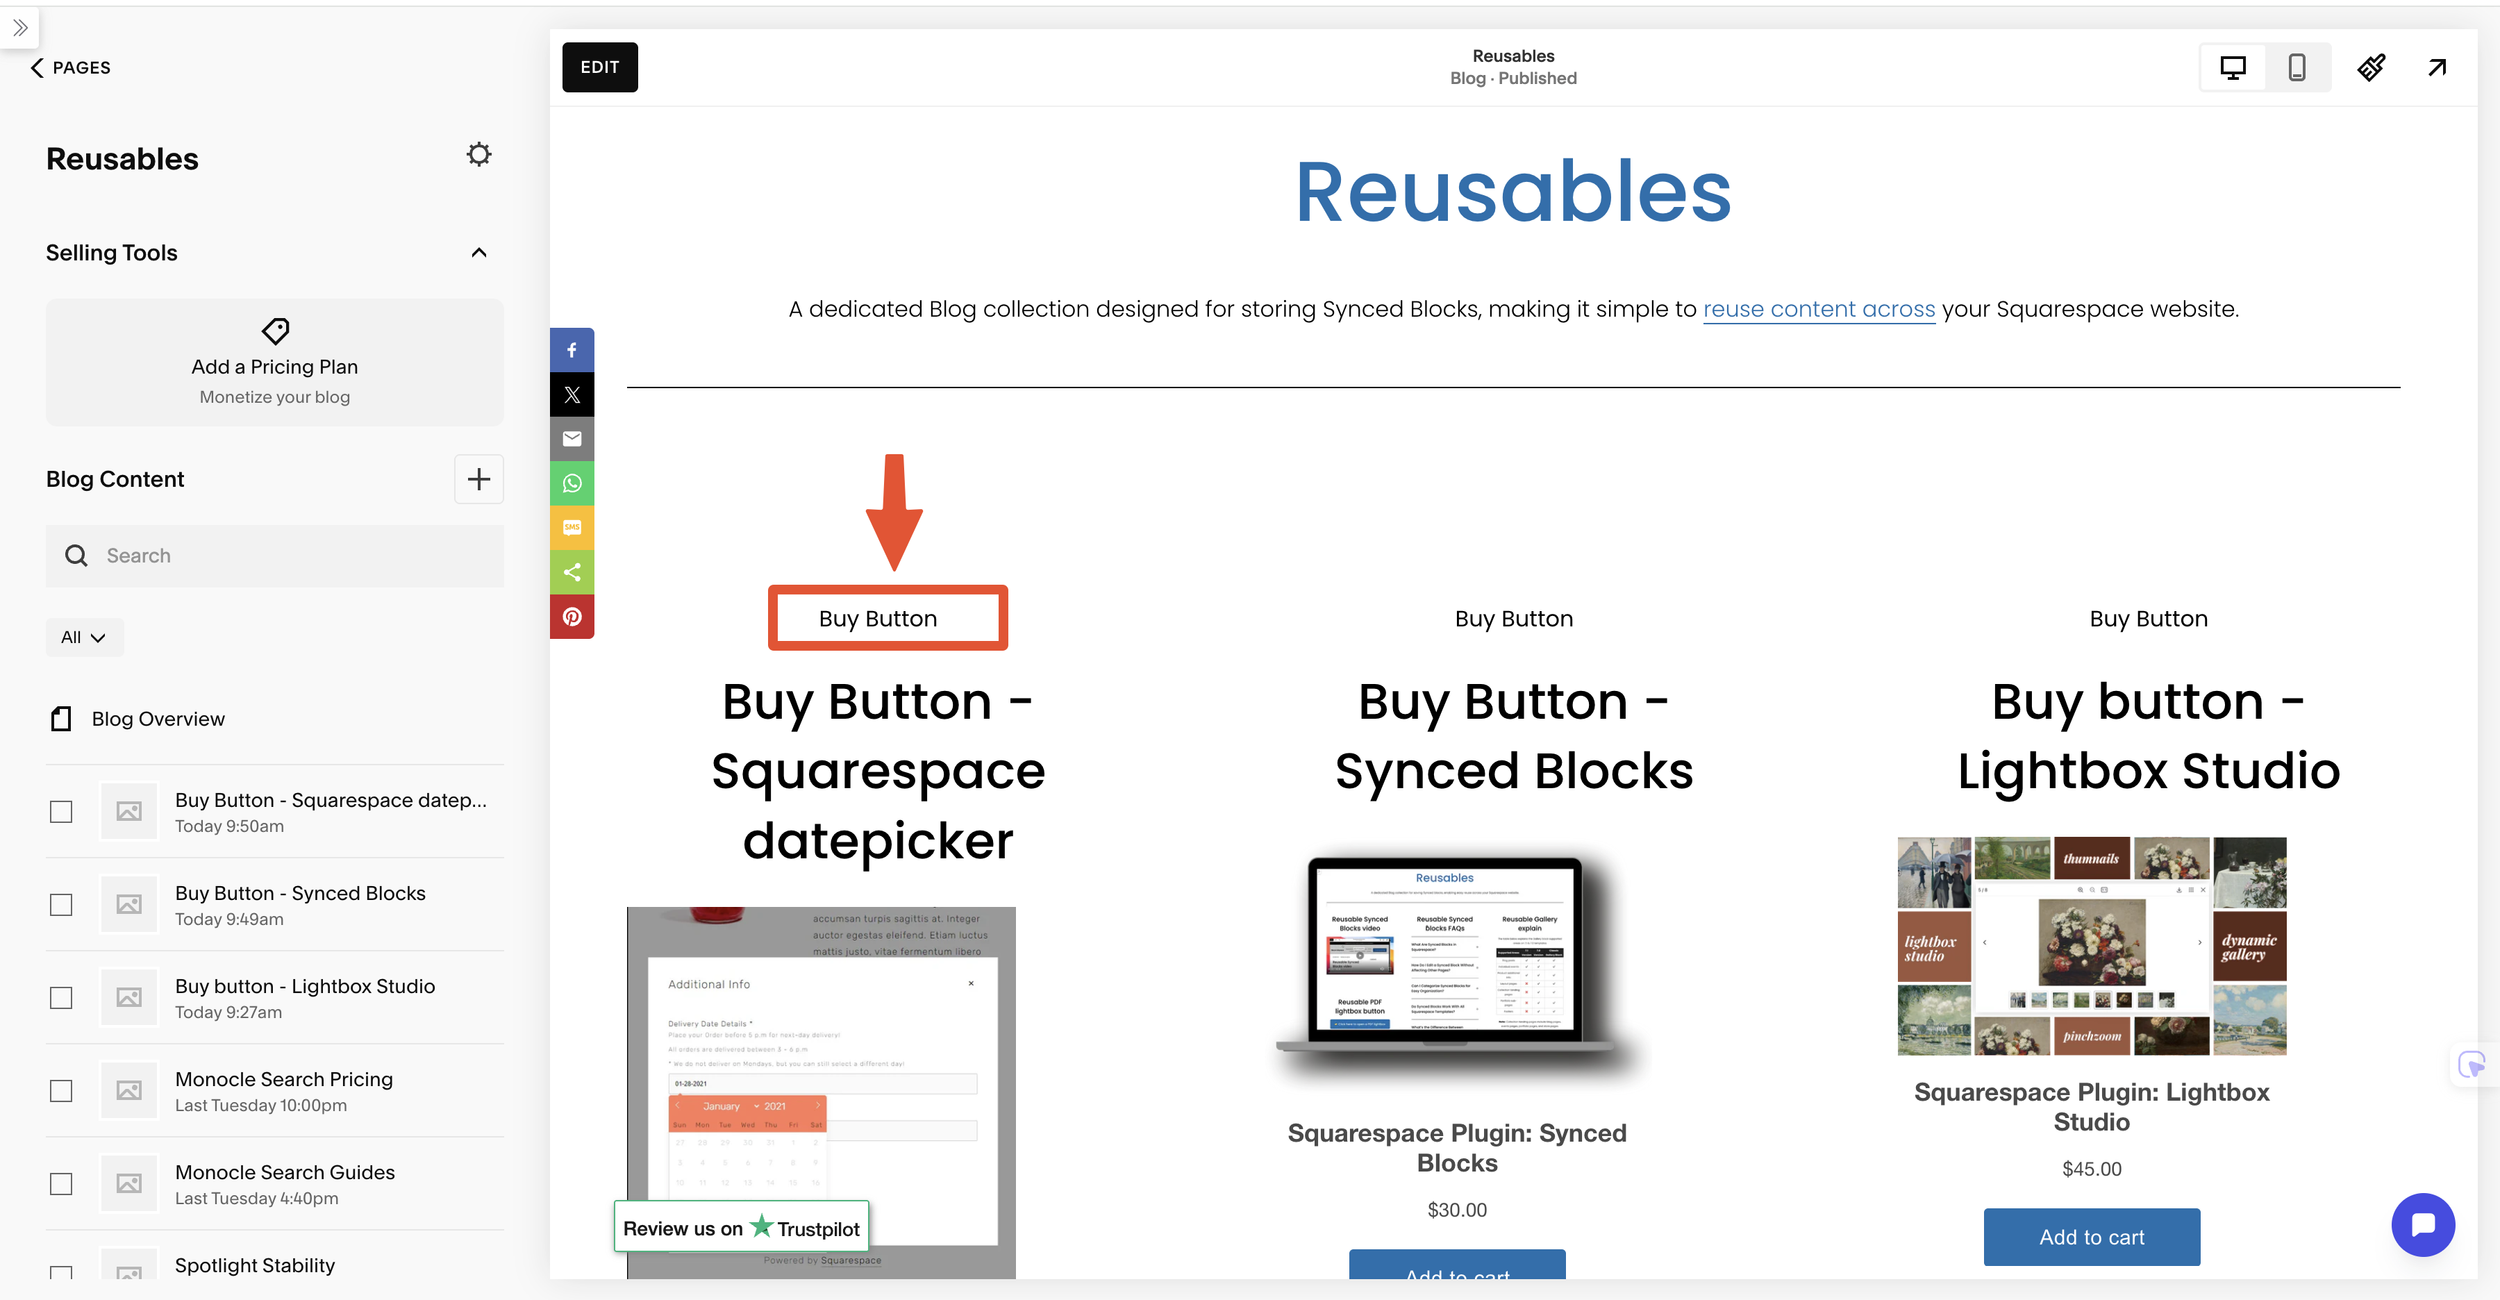
Group Buy buttons
Why This Method is a Game-Changer
Using this method, you have created a single, centralized Buy Button. Now, if you need to update the button's style, change the product details, or even swap out the product entirely, you just have to do it once in the original Reusables post. The changes will automatically be reflected on every page where the Synced Block is placed, saving you a massive amount of time and effort while ensuring consistency across your entire site.
This method isn't just for product landing pages. You can also place individual Buy Buttons as powerful call-to-actions (CTAs) directly within blog posts and articles, making it easier for readers to purchase products relevant to the content they are consuming.