N8N Series: A Beginner’s Guide to Automation and Key Functions
Automation is now essential for businesses and individuals to save time, reduce mistakes, and connect different tools easily. N8N is a flexible, open-source automation tool that lets users of any skill level create powerful workflows with little or no coding. This post will explain its main parts to help you start making your own custom workflows.
General Interface of N8N
We can use N8N either with the cloud version or by self-hosting it on your own server. In this post, we assume that you have already registered an account in order to access N8N. After logging into N8N, here is the general interface that you will use to work with the platform.
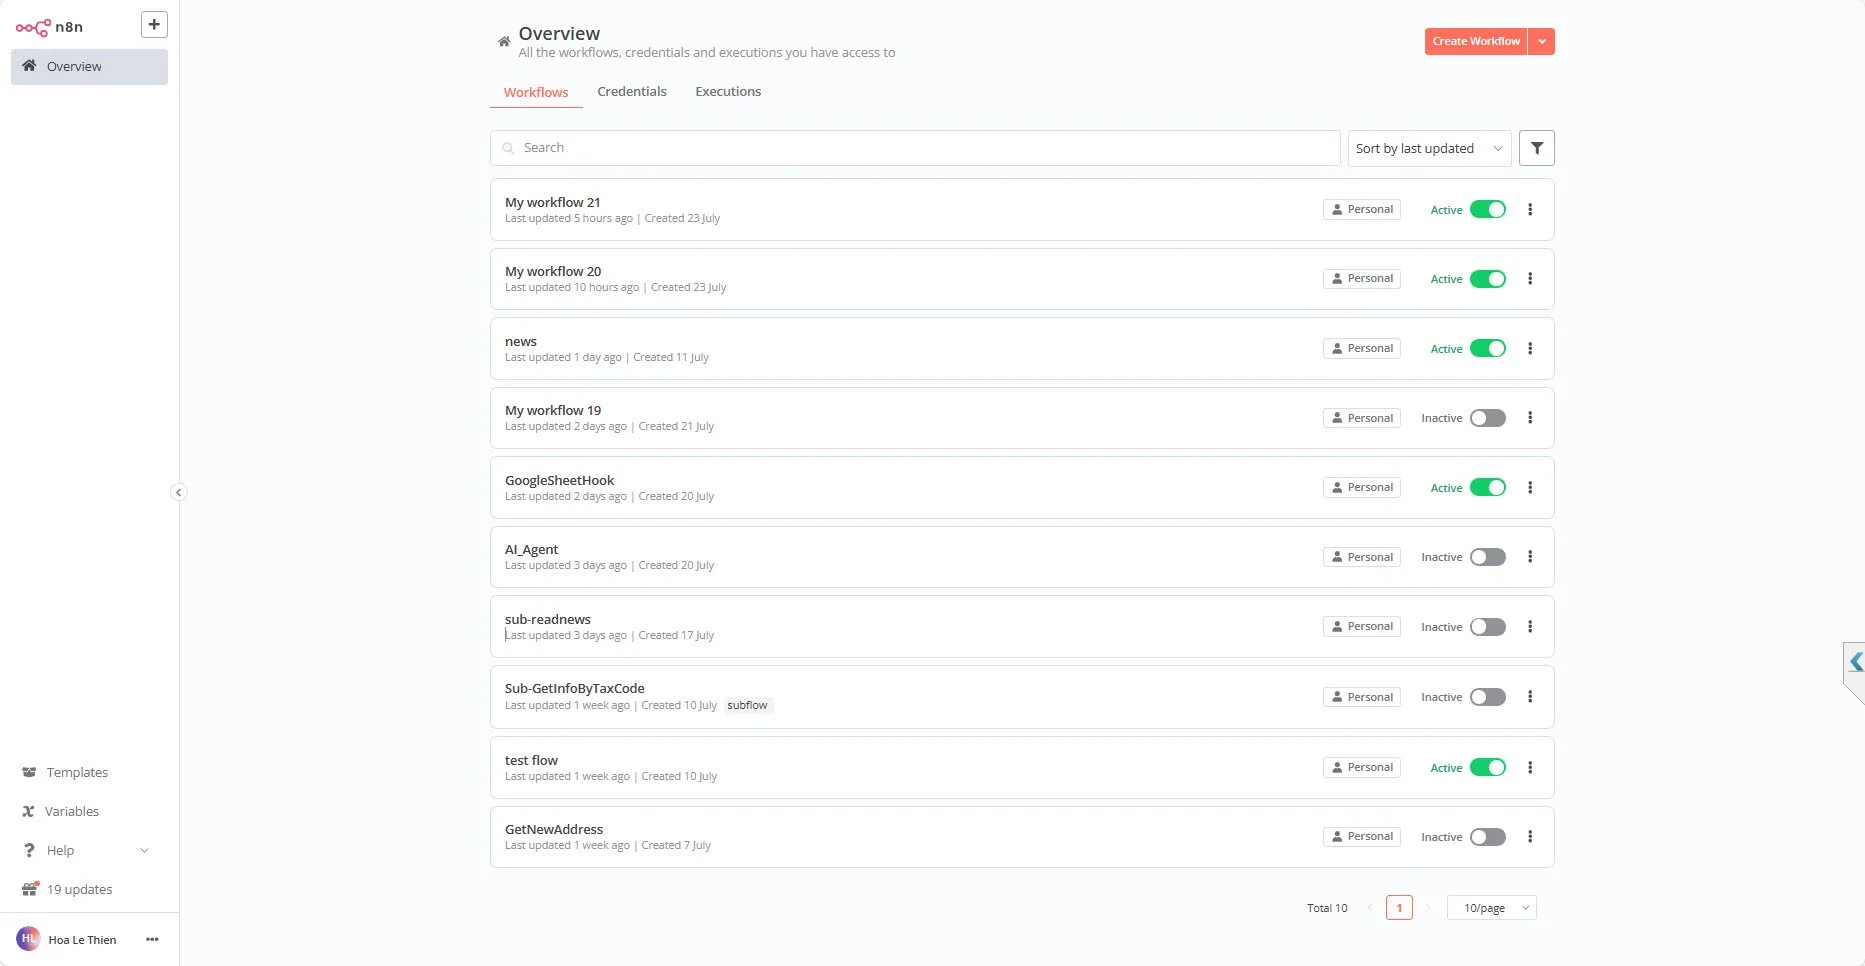
At this view, we can easily manage all the workflows we have created previously, as well as any credentials that we have set up for those workflows. There is no need to wait any longer—let’s get started by creating your first automation workflow right now.
Create your workflow
The n8n interface is designed to be intuitive, even for beginners, while still offering the flexibility needed by advanced users. When you log in or launch n8n, you’re greeted with a visual workflow editor, which is the main canvas where you build and arrange your automation workflows
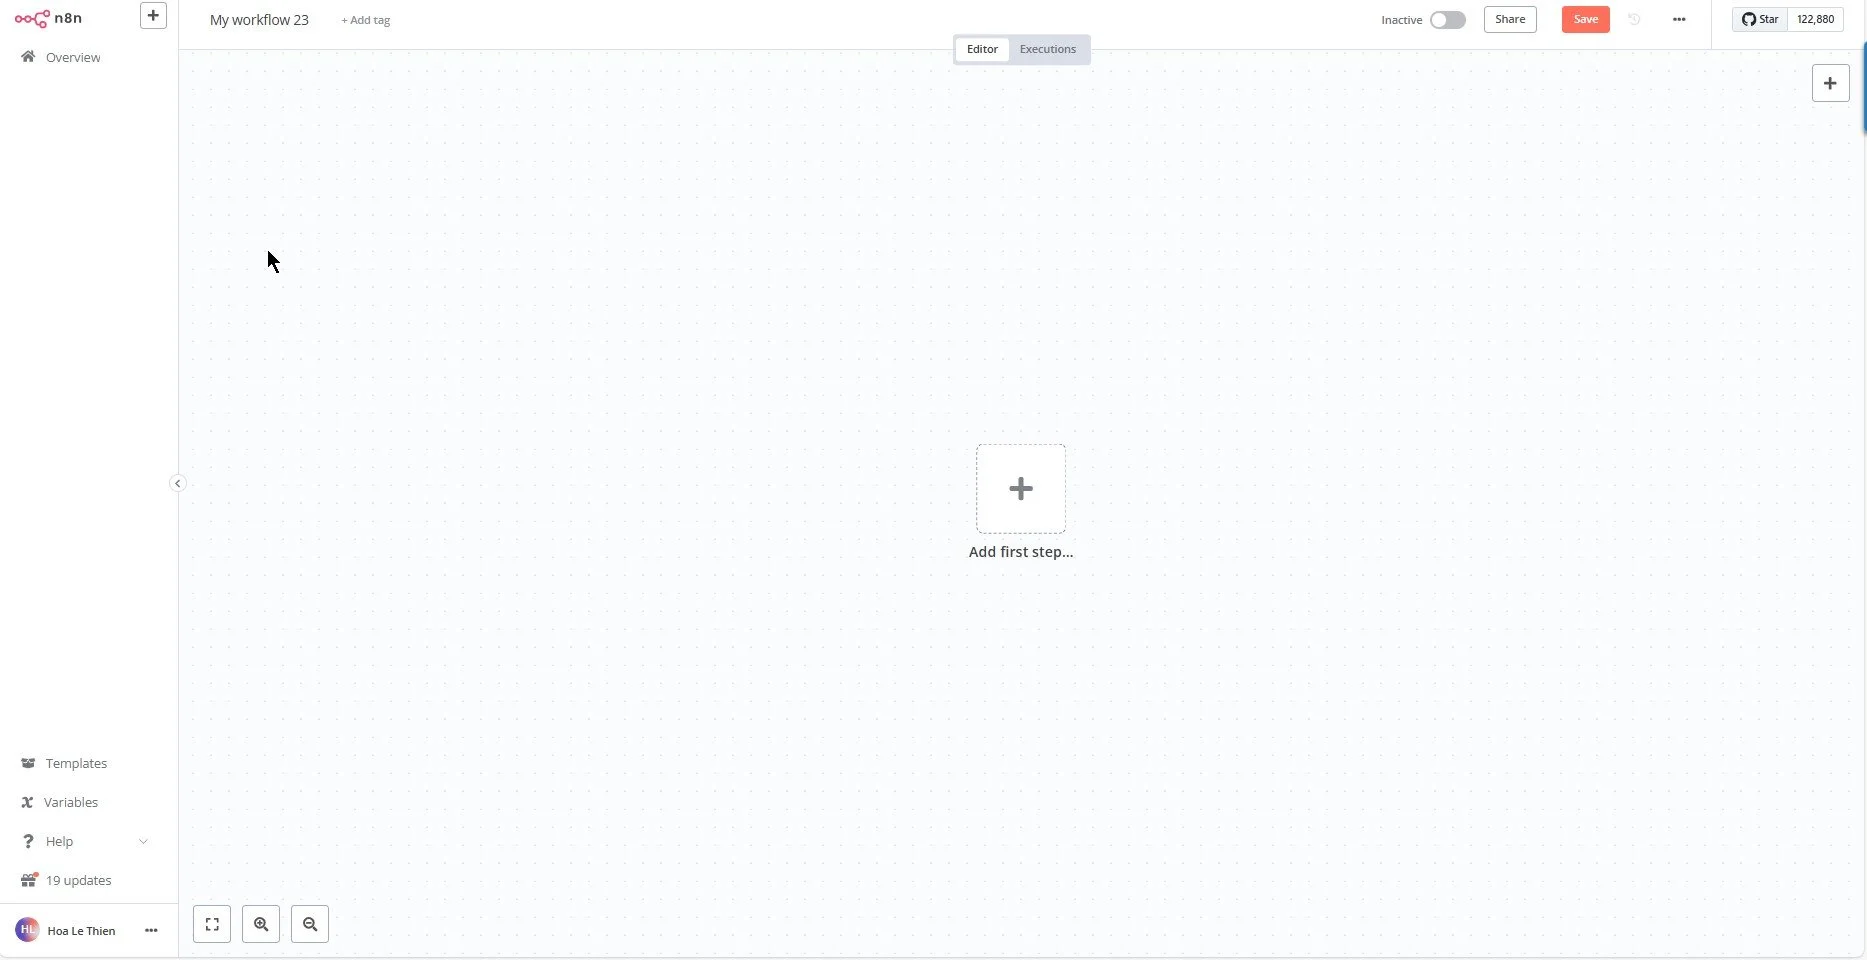
Your workflow canvas
Begin your workflow
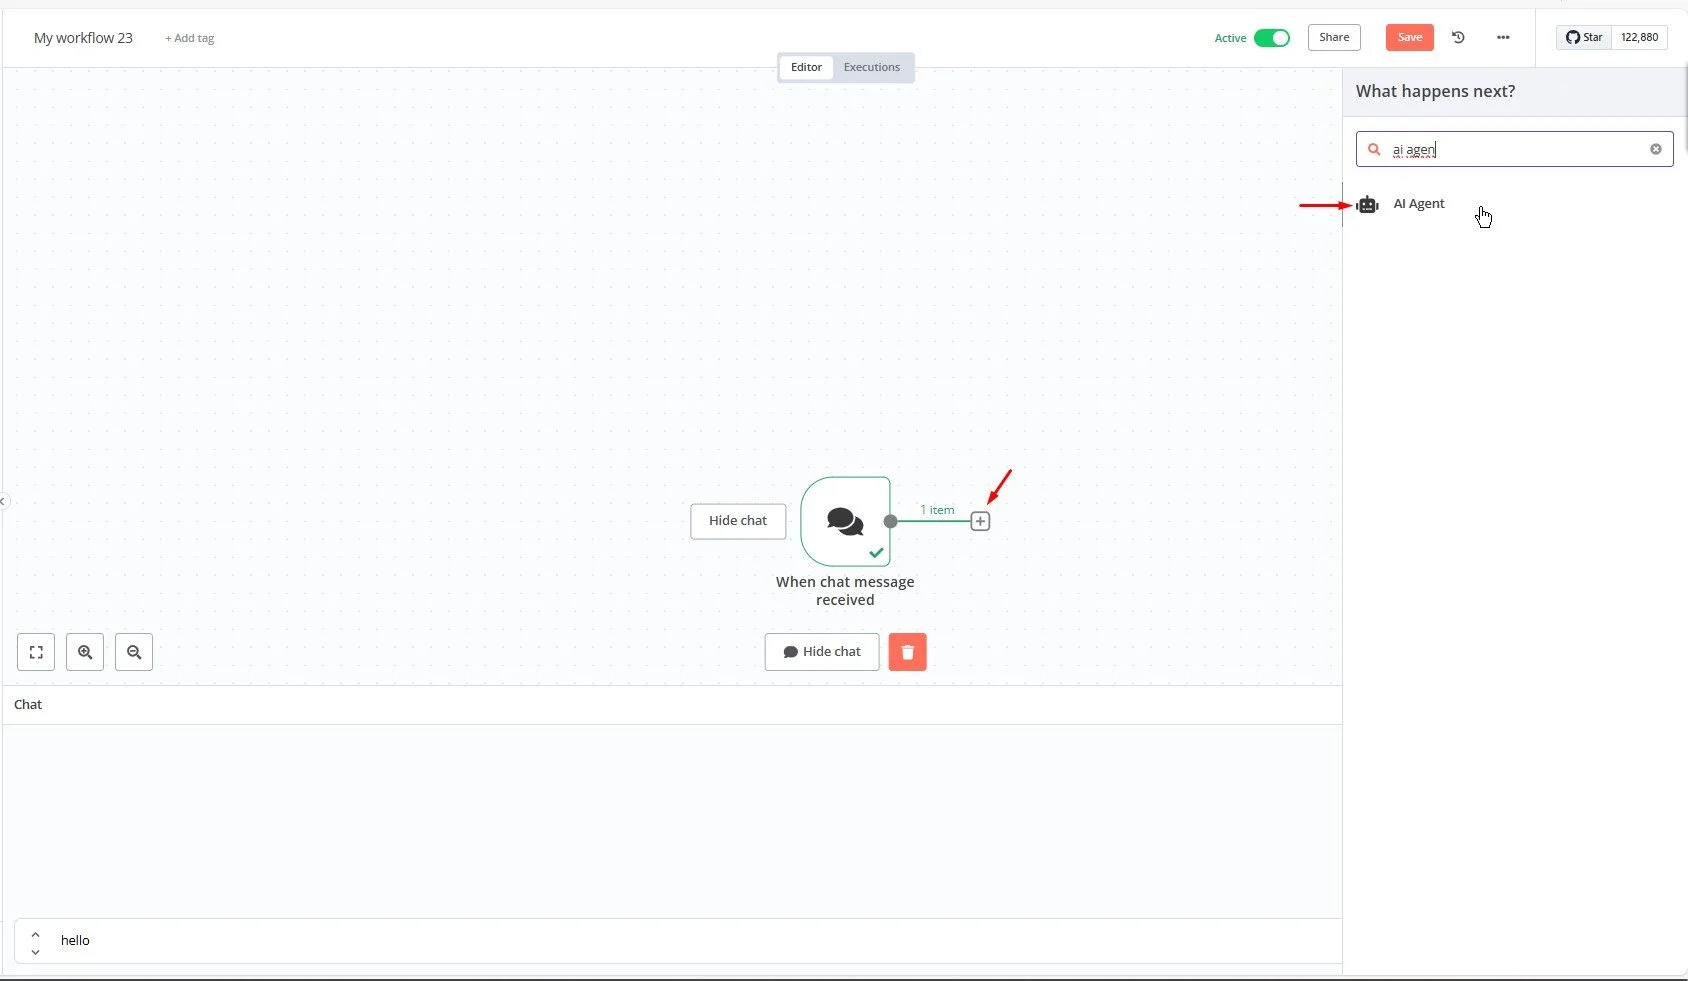
In N8N, you always work with elements called nodes. The starting point of a workflow is the trigger node.
Click the + icon (Add first step) to set when your process starts. You can choose from many trigger actions.

There are many trigger Actions N8N can support
Some simple triggers are:
Trigger Manually: mainly for testing your workflow
On chat message: triggers when a message is sent via N8n chatbox in your workflow
On schedule: triggers at a set time you choose
More advanced triggers include:
App event: runs the workflow when something changes or happens in another app
Executed by another workflow: used if you create a subflow that runs when the main workflow calls it
On webhook call: creates a simple API endpoint to get data from an API request
This post gives a simple demo using the On chat message action.
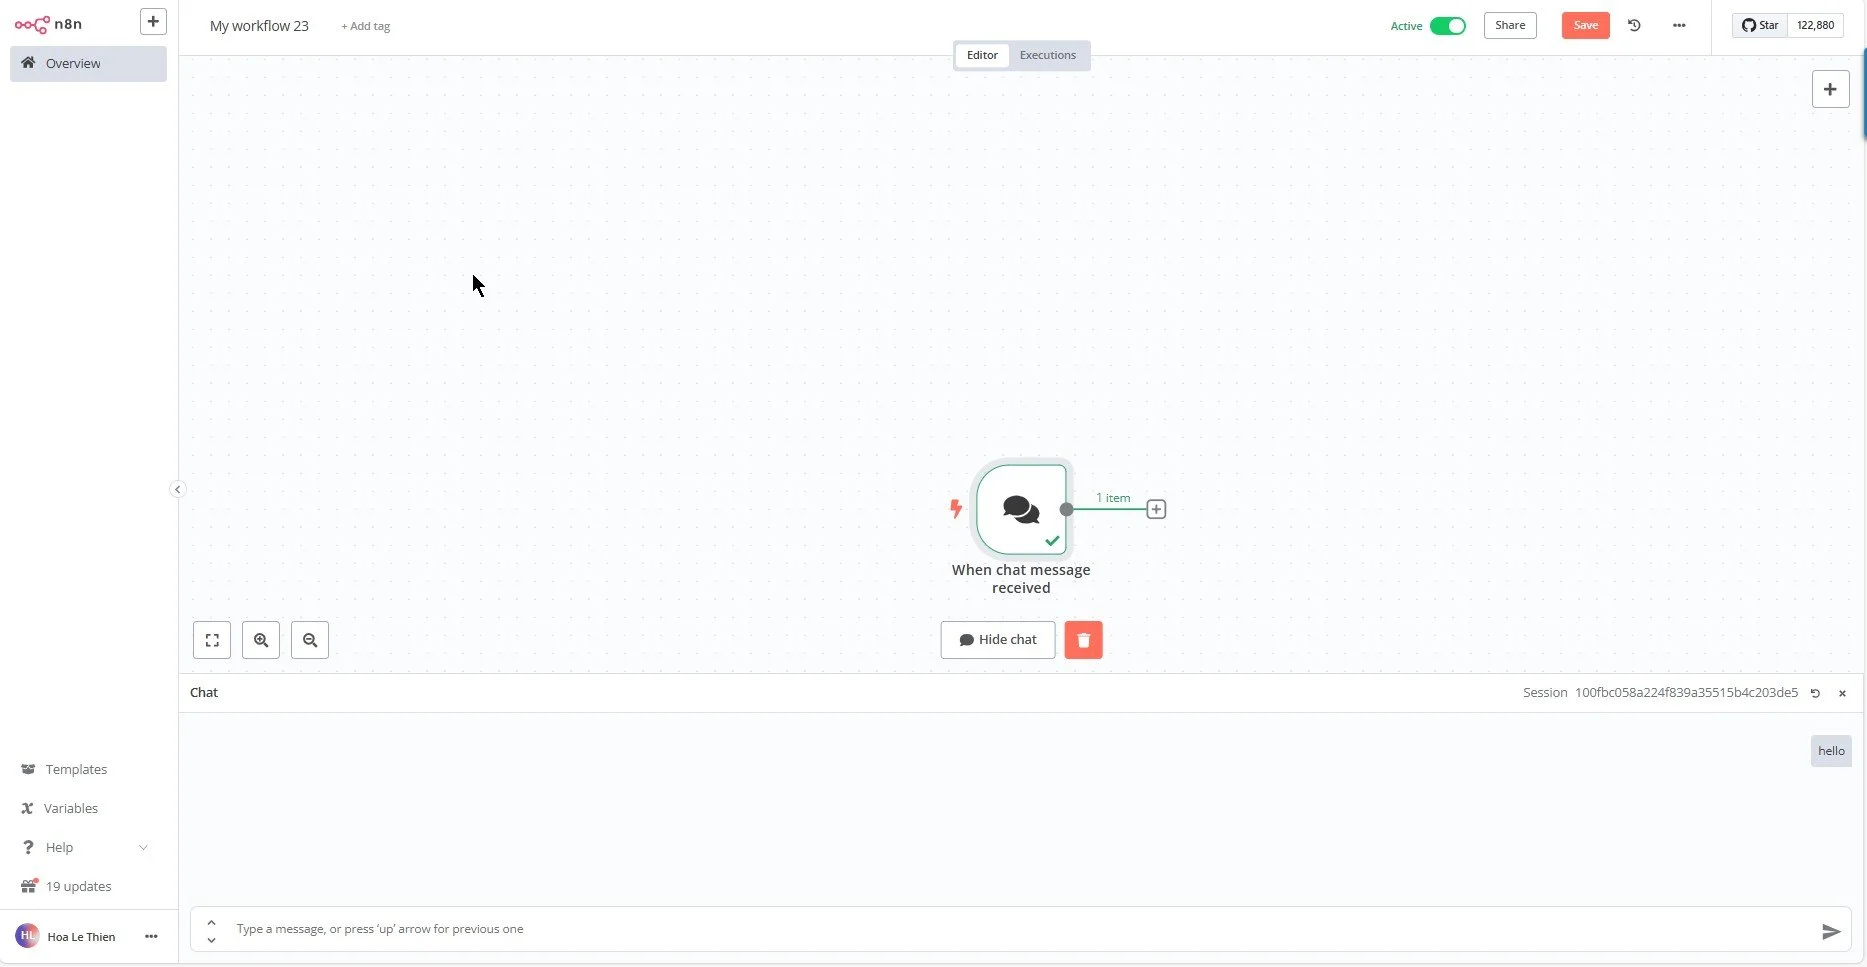
Send any message to test your flow
After sending a message, you can double-click on this node to see the information about your message data:
sessionId
action
chatInput
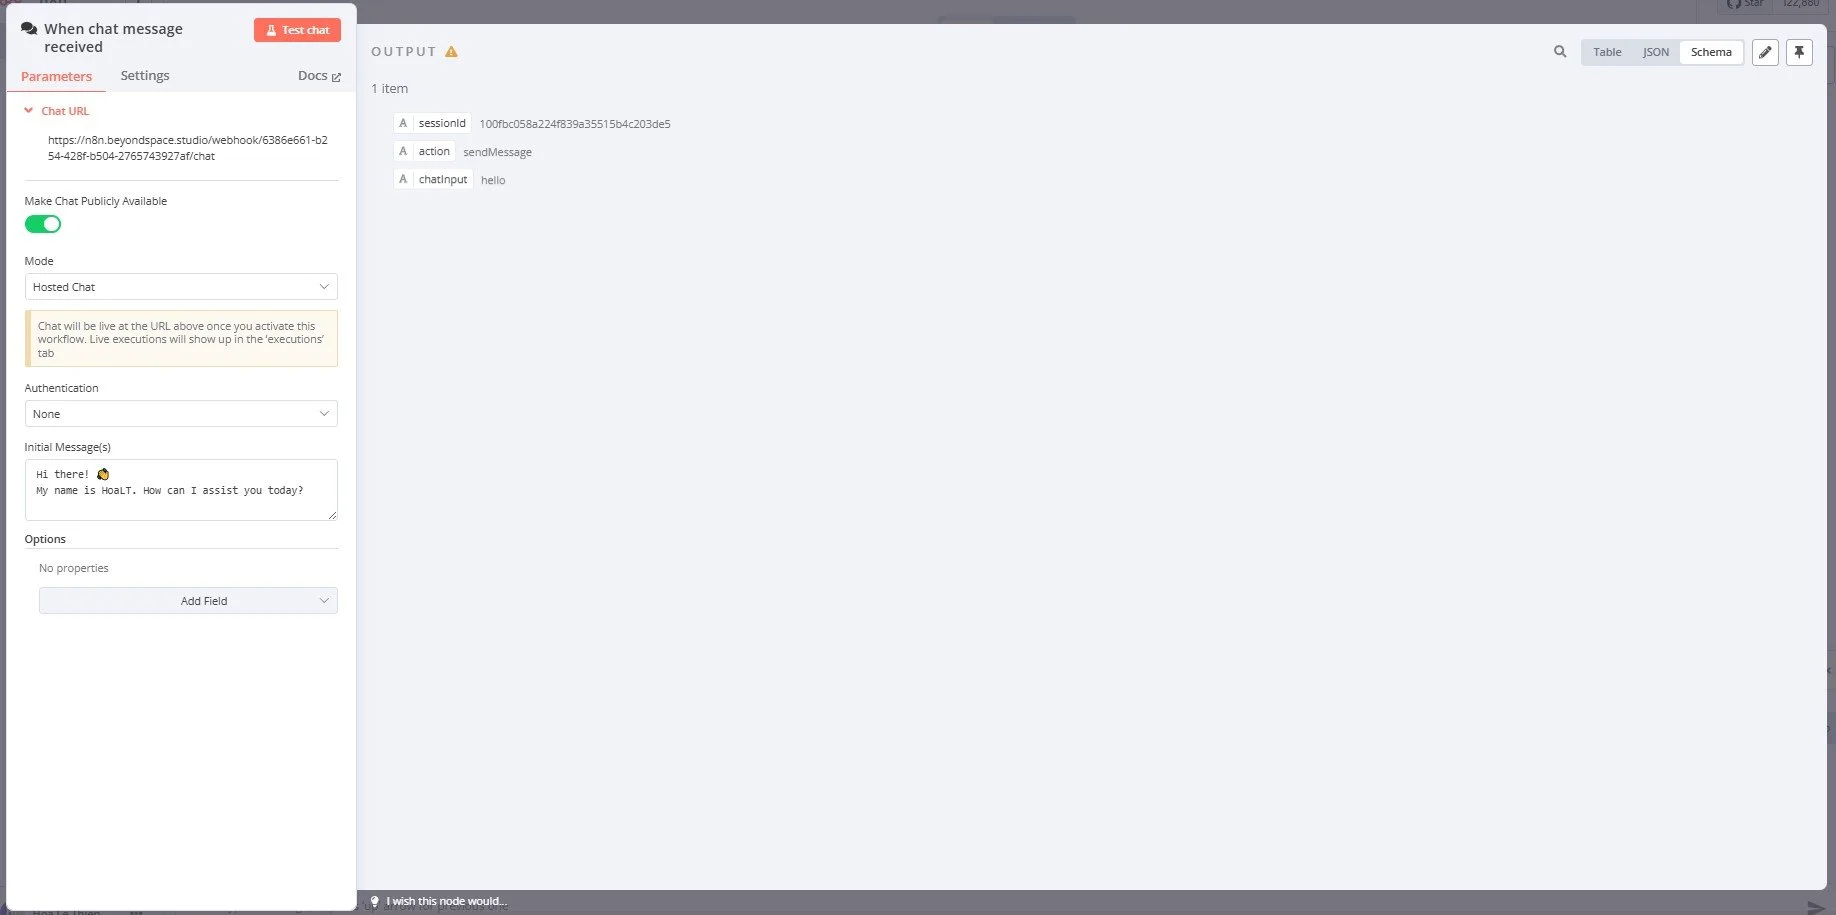
Your data message
Provide your next action
By creating a following node, you create a next step that can handle the data from your previous node. On my demo, I will use the AI Agent node to make a simple custom chatbox
One key feature of N8N is sharing data between nodes to keep your process running smoothly. In this example, the message data input is used for the next node.
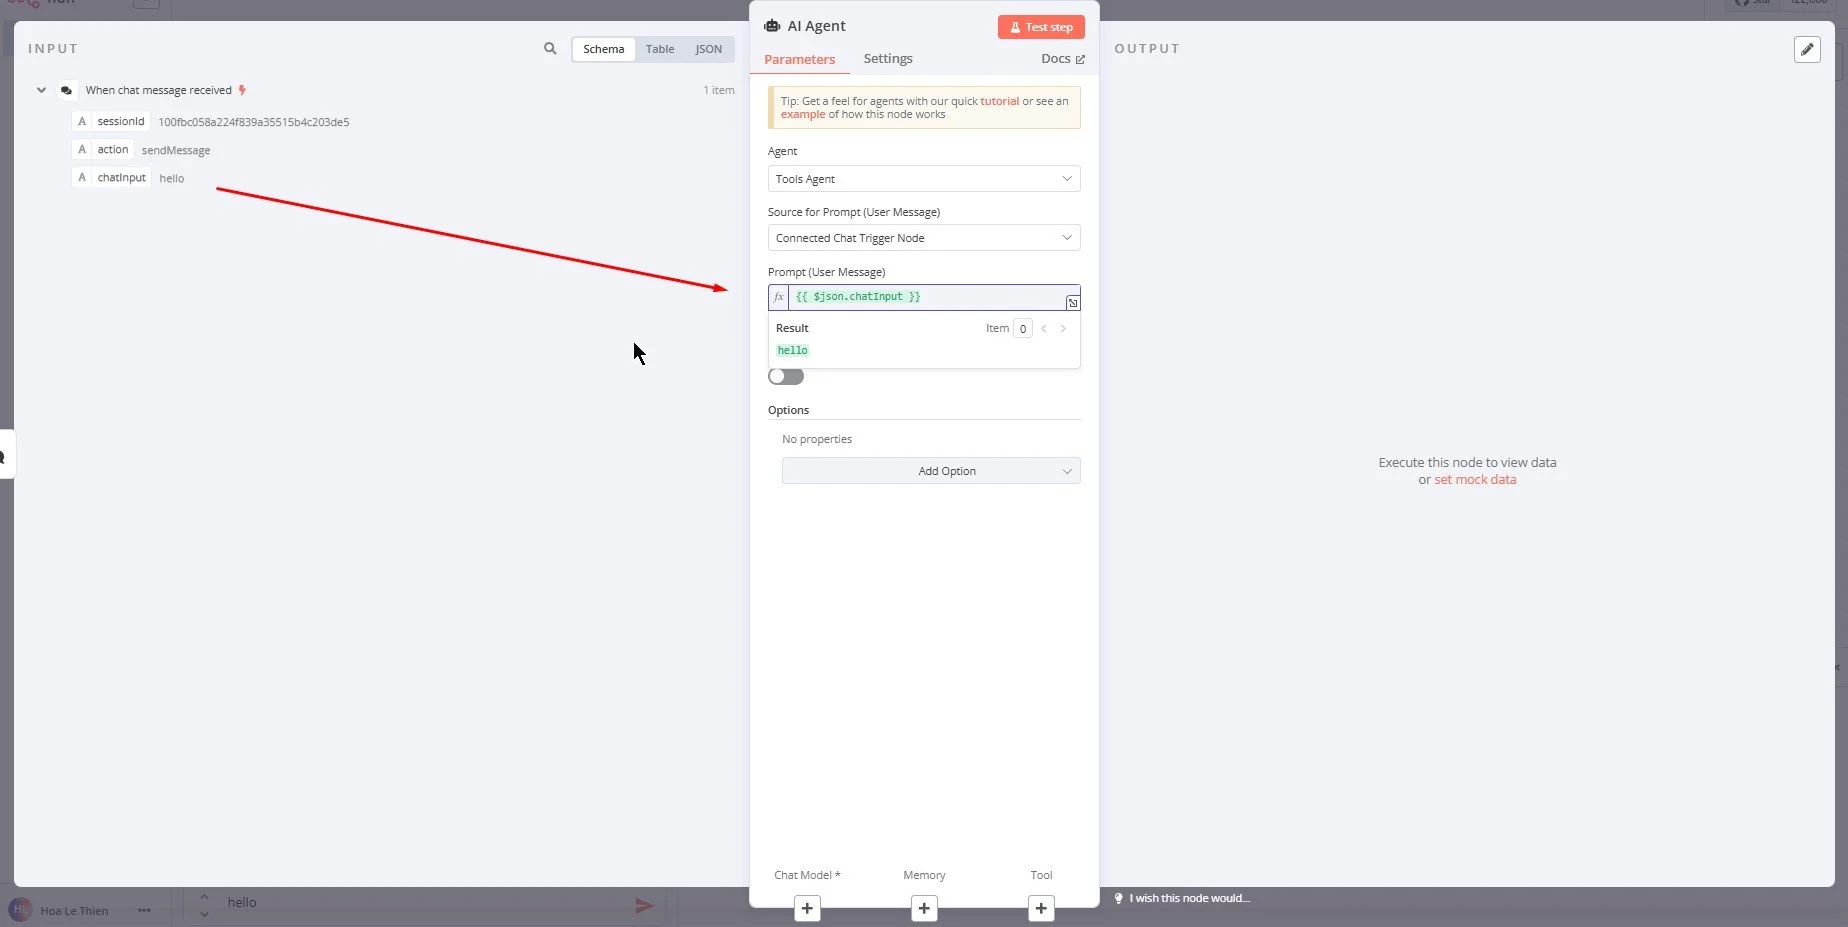
Inherit data from previous node to run on the your next node (step)
Test your workflow
After setting up the essential node, we can test to check the workflow
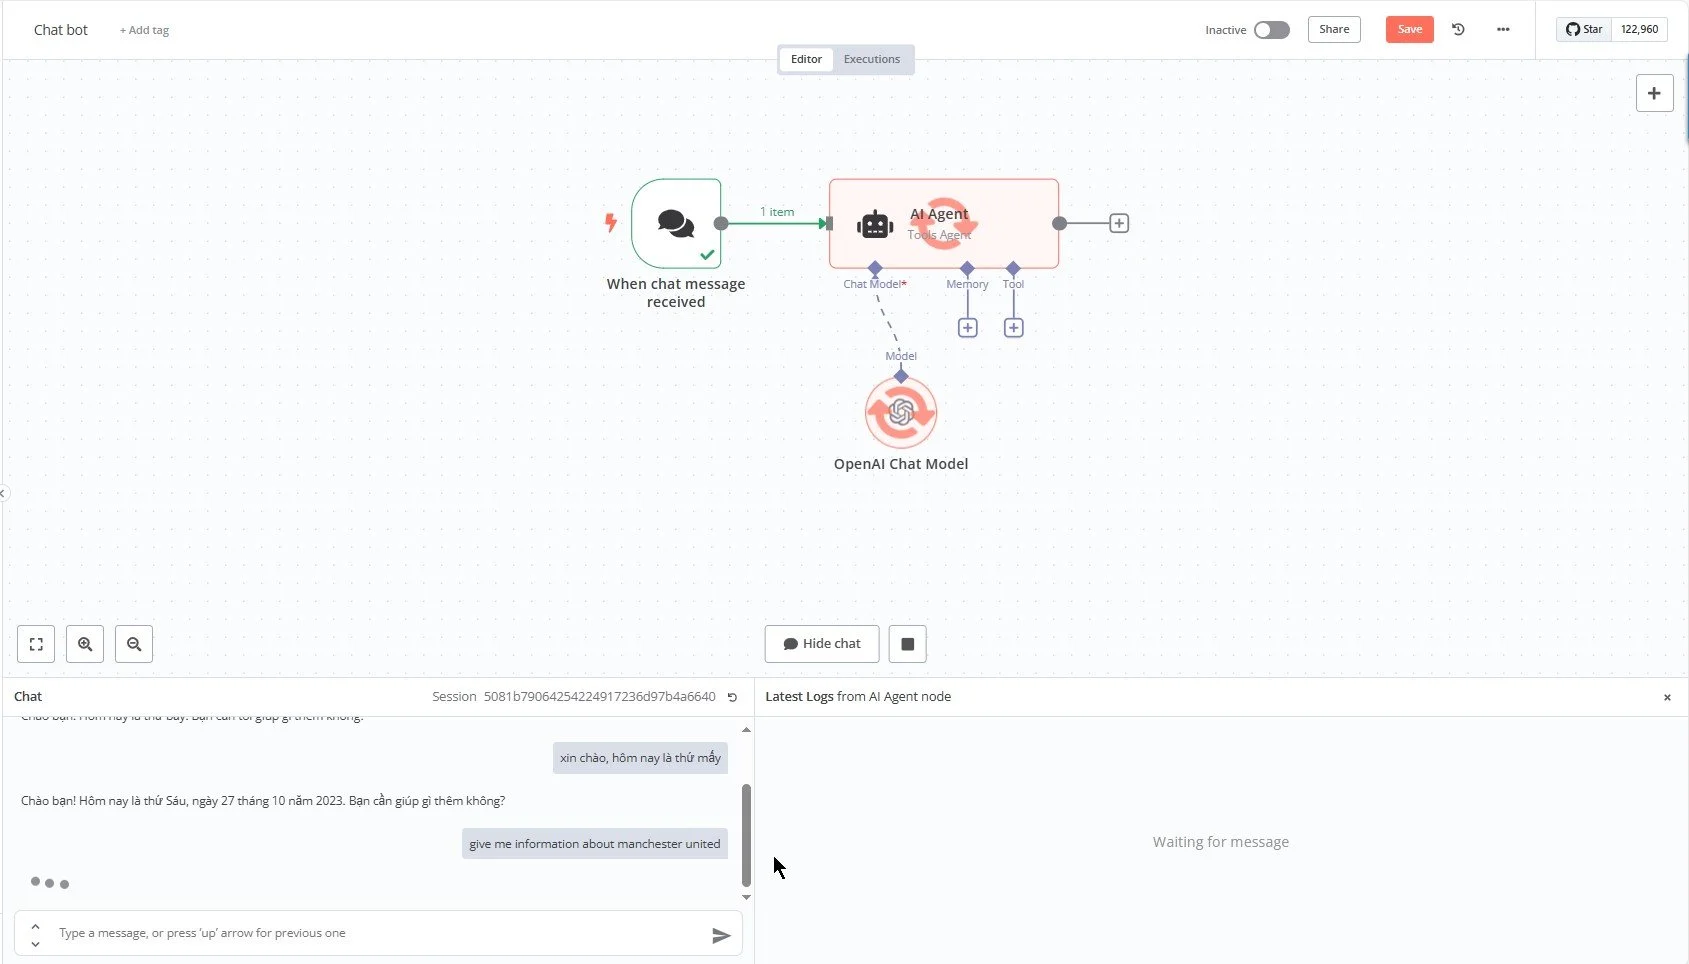
We can see the process when running test
Go-live the workflow
After you check that everything work as you expect, you can select active to run it in production environment
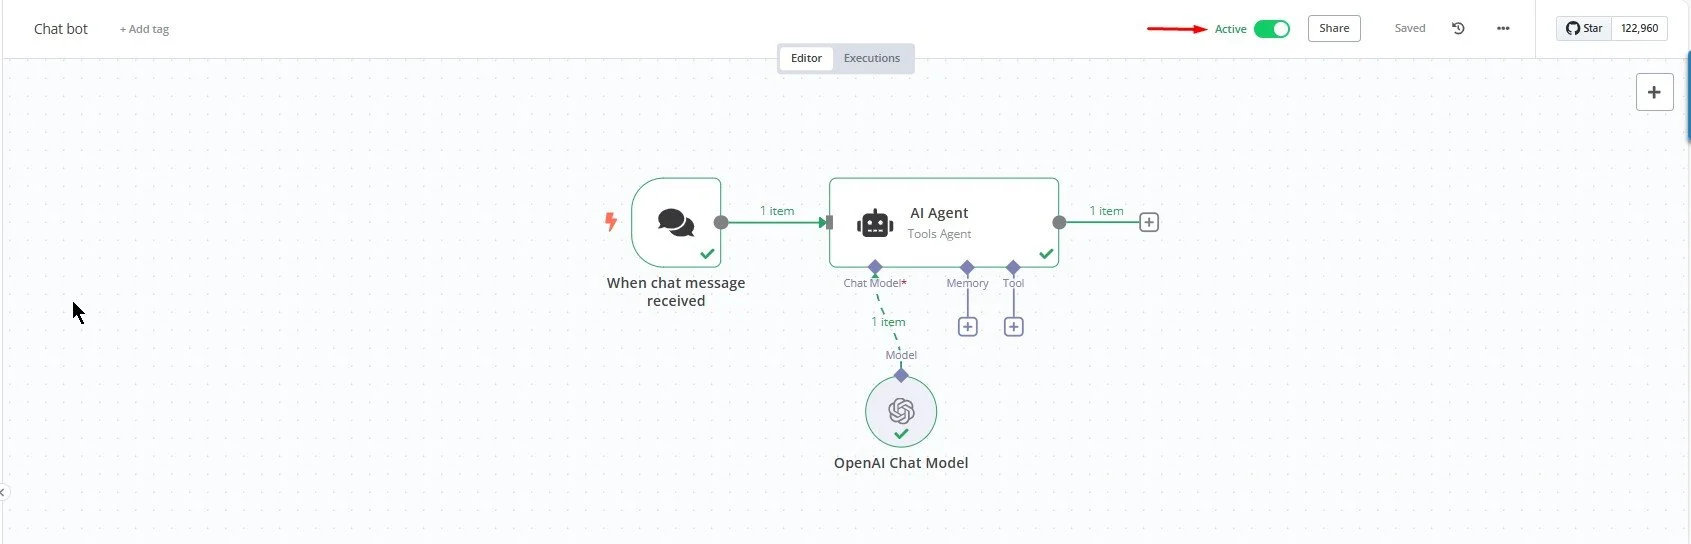
Run active for your workflow here
Credentials
N8N credentials are needed to safely connect and verify third-party services in the n8n workflow platform. They hold important info like API keys, tokens, or login details to help apps work together smoothly and securely. More details on setting up and managing N8N credentials will come in the next posts.
In summary
This guide serves as a foundational overview to help you better understand how to work efficiently with N8N. In our upcoming posts, we’ll walk you through hands-on examples with clear, step-by-step instructions and practical tips. Stay with us as we explore each stage in detail, ensuring you can confidently apply what you learn to real use cases.