N8N Series - Install n8n Easily with Docker Desktop: Your Quick-Start Guide
n8n is a powerful open-source automation tool that lets you create custom workflows easily. While the n8n cloud version offers convenience, self-hosting n8n is essential for advanced development and testing. However, manual installation can cause software conflicts and dependency issues. Using Docker Desktop simplifies everything — it provides a clean, isolated environment for a smooth n8n Docker installation. Going through this guide, you can quickly set up, run, and manage a reliable n8n instance on Docker without affecting your main system.
Prerequisites: What You Need to Get Started
Docker Desktop
Download Docker Desktop from the official Docker website.
Follow the installation steps for your operating system (Windows, macOS, or Linux).
Once installed, launch Docker Desktop and verify it’s running.
On Windows, you can open a terminal (PowerShell or CMD) and run
docker --v
docker --version
When you get result like Docker version 28.4.0, build XXX, it means that docker engine is working on your device. Now, you can move on the next steps.
Create a Working Folder for n8n
In default, Docker automatically stores all data inside its internal storage area if you don’t explicitly create and mount a folder. Why This Matters? The n8n container stores workflows, credentials, and settings under its internal storage. Once you remove or recreate the container, your data will be lost.
Therefore, the best practice is that we create a working space for storing your n8n data. Example: you can create a folder like D:\N8N\data
Quick n8n Setup Docker
Download N8N image
Once Docker Desktop is installed and running, the first step is to download the official n8n image from Docker Hub. This image contains everything needed to run n8n inside a containerized environment.
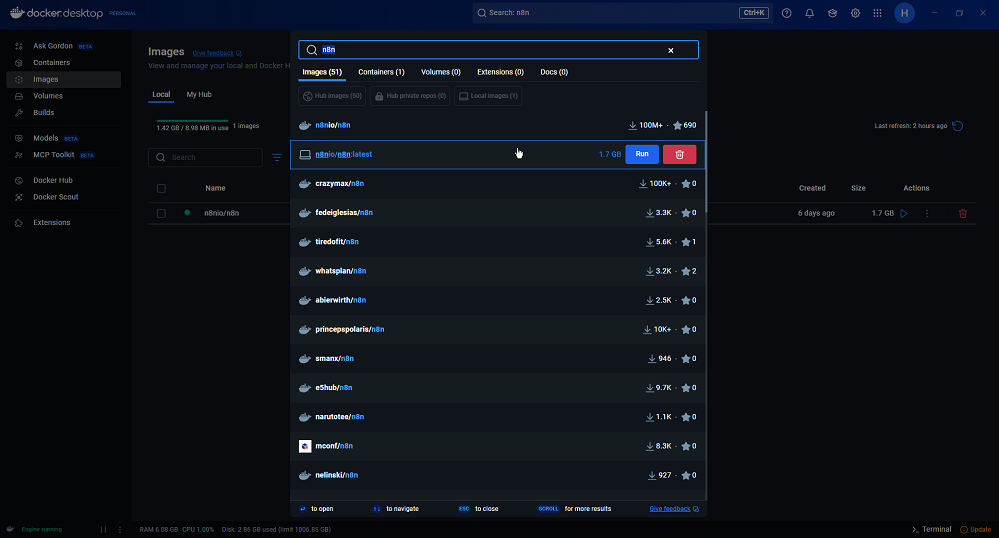
Pull the official n8n image on docker hub
Downloading the N8N image may take some time. After it's finished, click the Run button to create an N8N container.
Run and Configure N8N Container
In the Images menu, after the download is complete, you will see an N8N image. Click on run button to start a container for n8n application
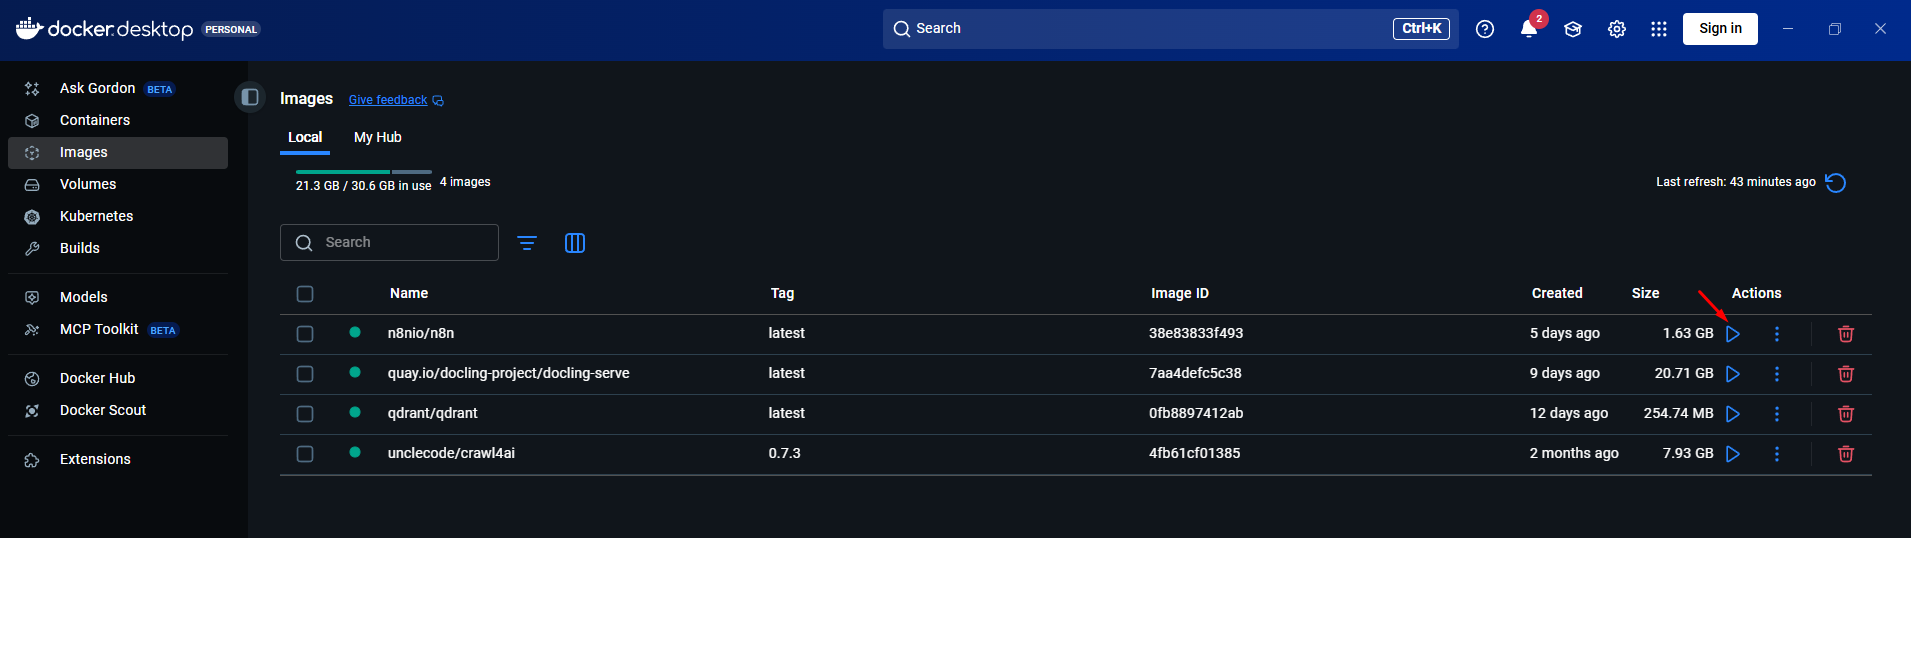
Run n8n container
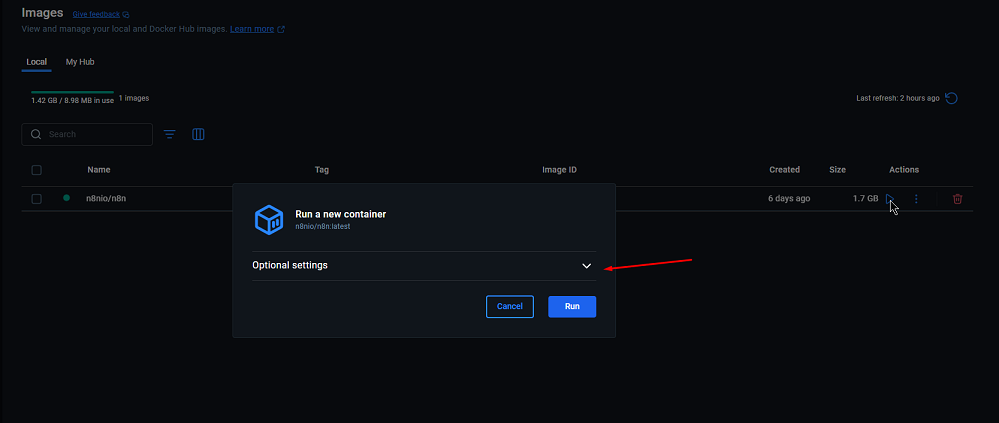
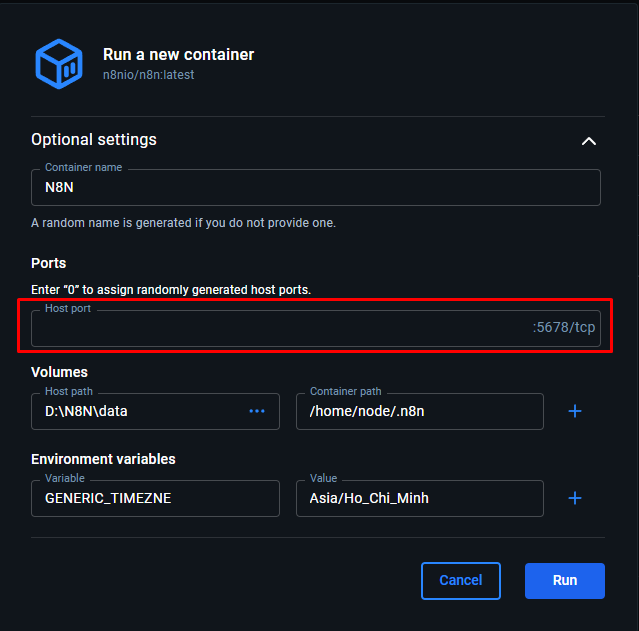
Provide some settings for container
Before starting the container, set up key settings to make sure it runs well.

Some essential settings before running n8n container
Container name: any name you choose for the container
Ports: use the default port 5678
Volumes:
Host path: choose the path of the working folder for n8n that you create before.
Container path: must fill with /home/node/.n8n
Environment Variables:
GENERIC_TIMEZONE: Asia/Ho_Chi_Minh (Sets the timezone used by n8n itself with IANA timezone name. Refer here to get your one: Moment Timezone | Home)
Click on Run to create n8n container
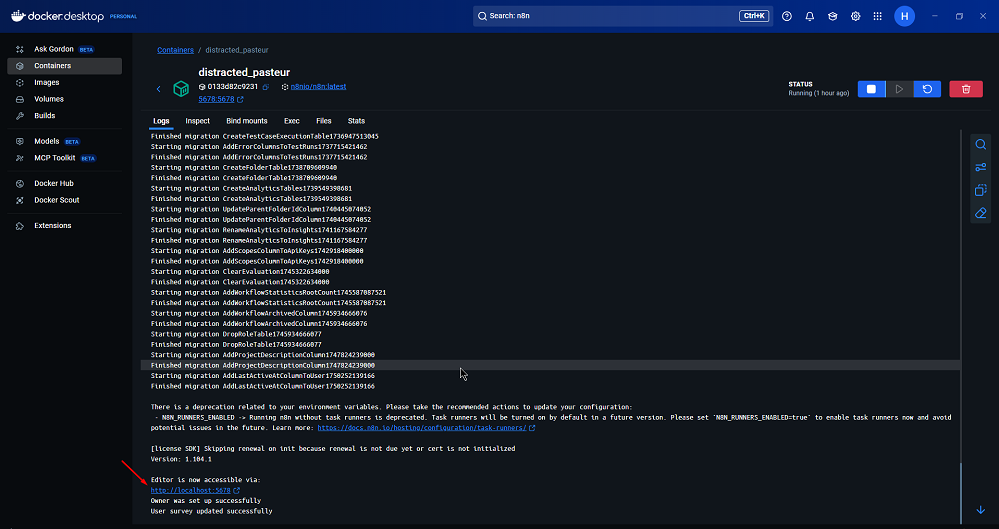
Complete creating the N8N container
At this step, you can access the N8N via the self-host link http://localhost:5678/
Accessing and Configuring Your Local n8n Instance
Once your n8n container is up and running, it’s time to access the local instance and complete the initial setup. This step allows you to create your admin account, configure security settings, and activate your local n8n environment.
Create Your Admin Account
Open your web browser and visit: http://localhost:5678/
On the first login screen, you should see the Set up owner account form.
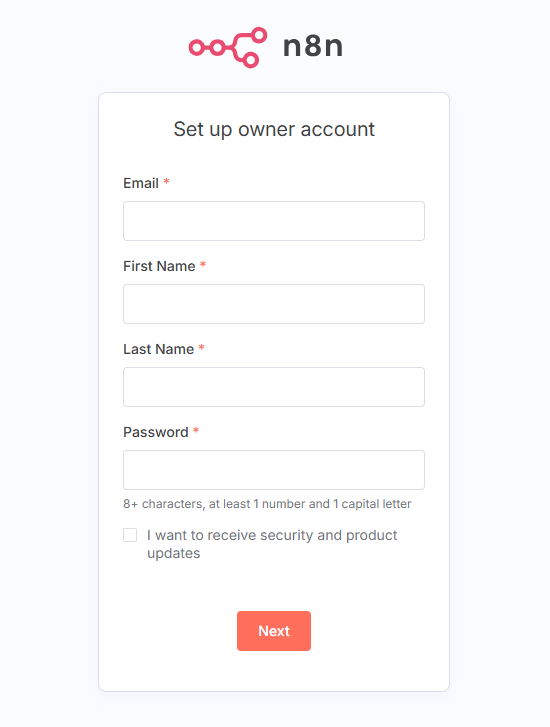
Set up owner account form
Enter your details carefully, making sure to provide a valid email address, as n8n will send an activation key to that email. You’ll need this key to verify your account and activate your n8n instance before accessing the main dashboard.
After entering all information, click Next to complete administrator registration.
A popup titled “Get paid features for free (forever)” appears. Click “Send me a free license key.” n8n will email you a license key that unlocks advanced features such as workflow history, debugging tools, and execution search.
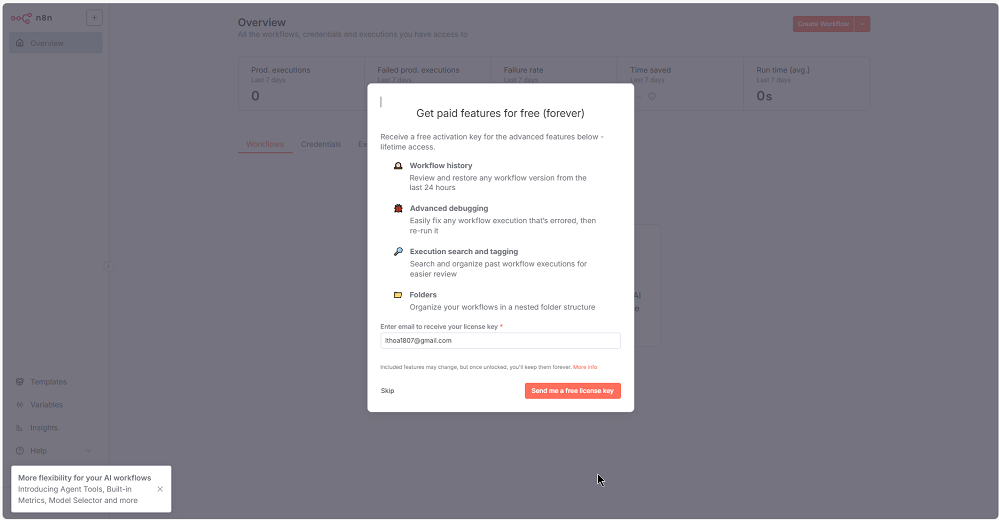
Send request to get license key
Activate the license key
Check your email for the admin account setup. N8N will send an email with a license key to activate your N8N application.
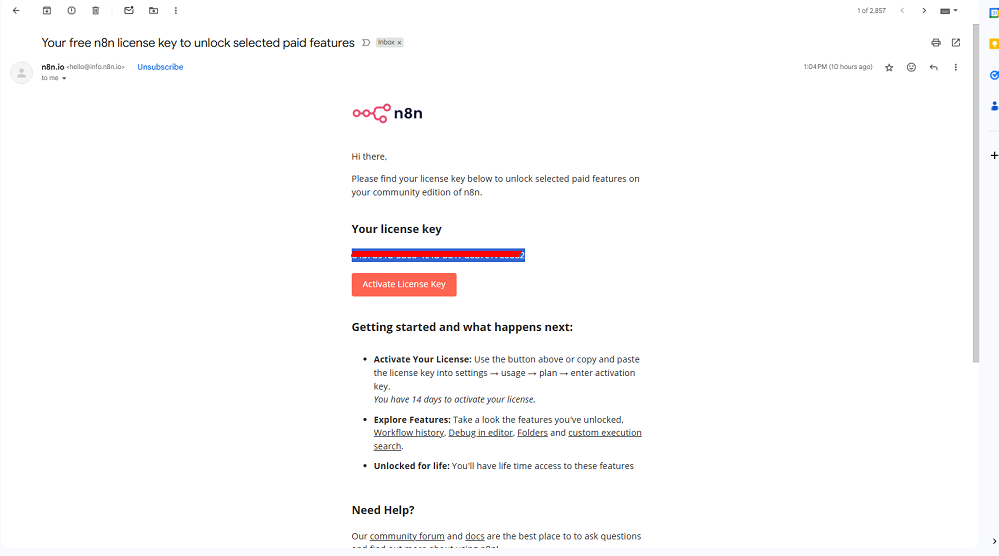
License key email
Click the Activate License Key link in the email to finish the activation.
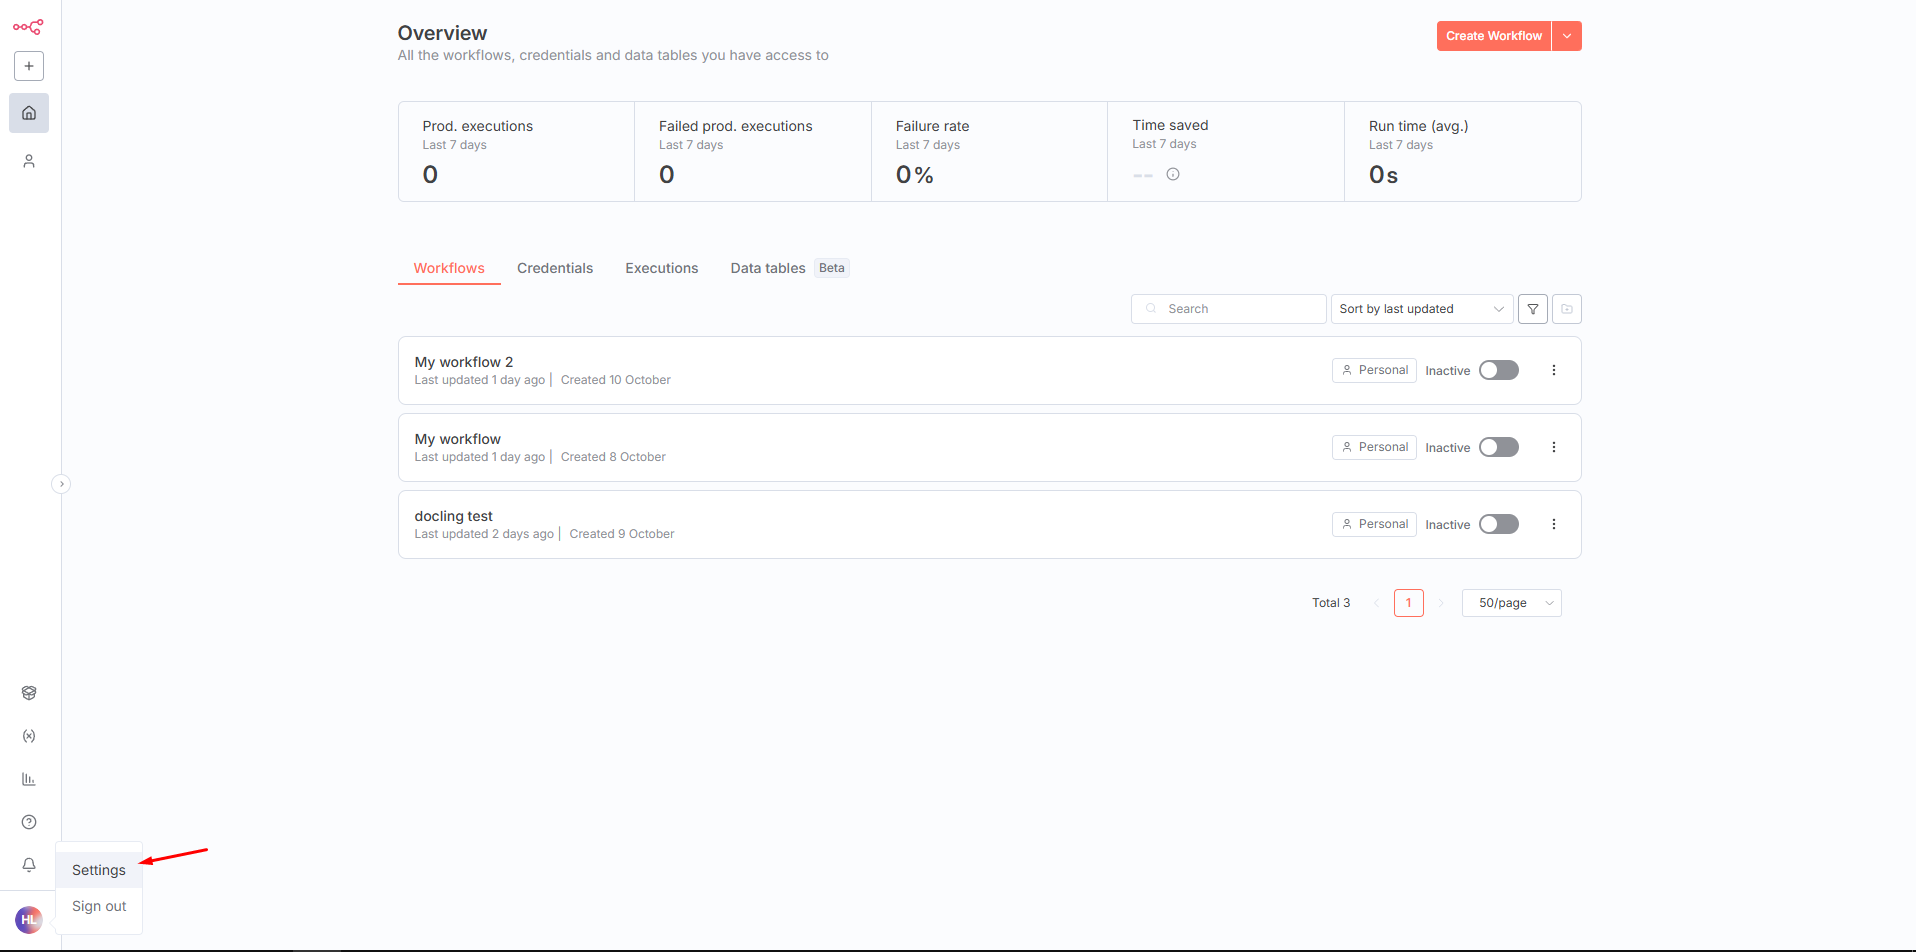
Or you can access the menu User Settings / Usage and Plan to enter the license key
User settings
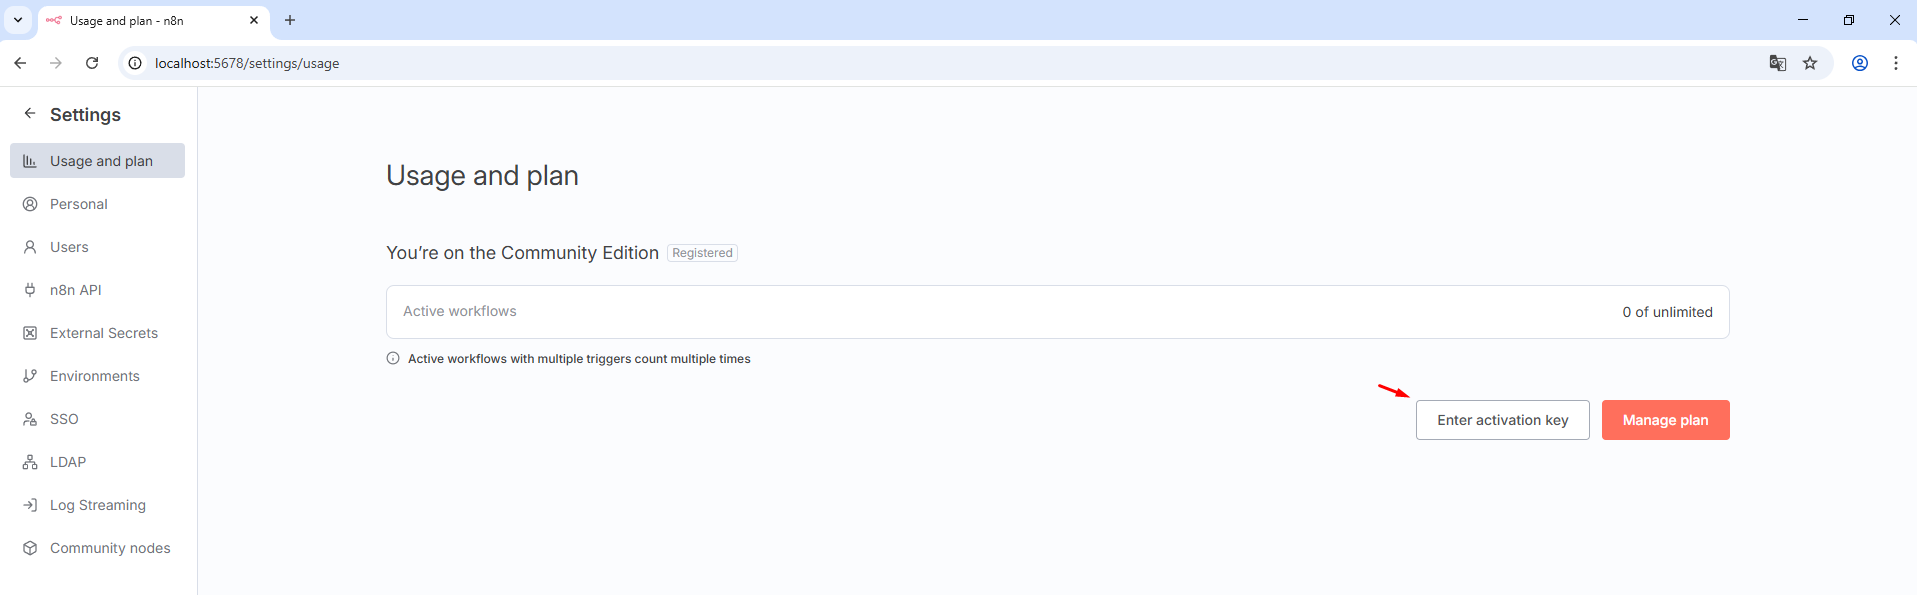
Usage and Plan > Enter activation key
Common Installation Issues
Cannot access N8N after creating container
Description: After starting the container, you cannot access the localhost link.
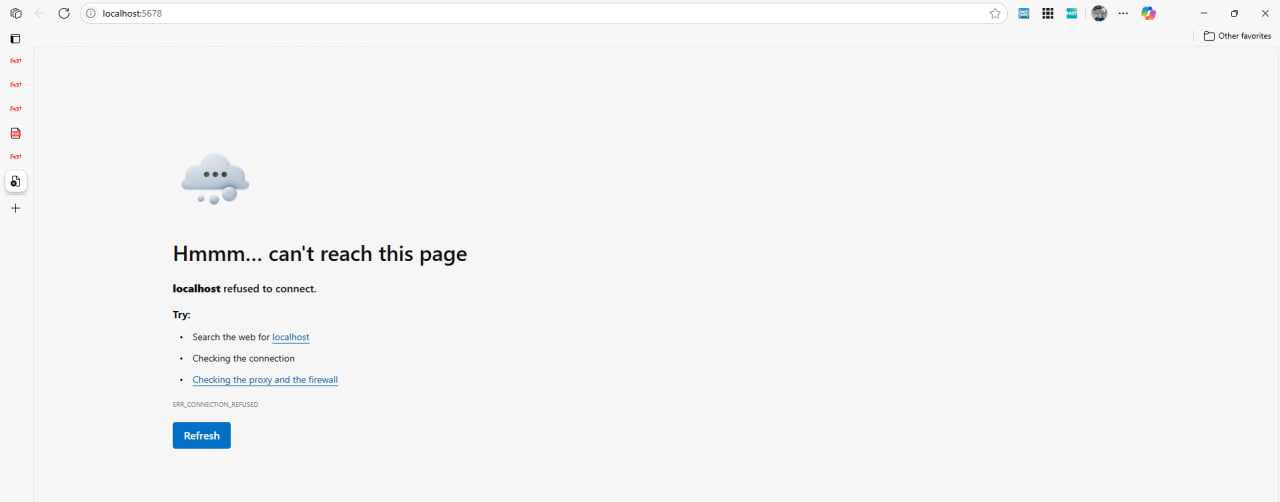
Cannot access N8N
Solution: check the option settings step when you run the container. The missing port information can cause this issue
Conclusion
By following this guide, you’ve installed and set up n8n with Docker Desktop, giving you a clean and reliable environment for building and testing automations. Running n8n locally lets you control your data and experiment freely, while Docker makes it easy to start, stop, or update your instance anytime. Stay tuned for our next guide, where we’ll show you how to make your n8n instance public and ready for production use.
“💡 Note:
Docker Desktop is free to use for personal projects, learning, and small teams.
If you’re using it for a larger company or in a commercial setup, you’ll need a paid Docker plan (Pro, Team, or Business).”